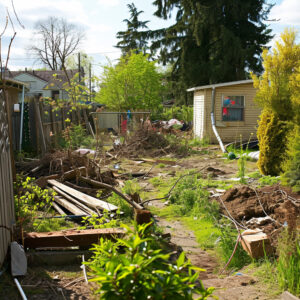
As I eye the wild tangle of my once-manicured backyard, a sense of stylish conquest stirs within me. With a nod to the minimalist magic of California dreamin’, it’s time to roll up my sleeves and dive into the world of yard clean-up and removal. Think less chaos, more charm—because who says a backyard overhaul can’t strut the same casual sophistication as a Jenni Kayne hideaway? So, foil me not, outdoor clutter, for I’m about to sprinkle a dash of garden organization genius in every nook and cranny of this domestic wilderness!
Gone are the days when cleaning up the great outdoors was shrugged off as mere drudgery. By weaving the ‘less is more’ philosophy into outdoor decluttering, I am set to shape a sanctuary that epitomizes ease and emulates the graceful living spaces crafted by the mavens of design. This isn’t just tidying; it’s a veritable backyard ballet, a graceful pirouette through seasonal debris, and a sure-footed leap towards landscape nirvana.
Key Takeaways
Embrace simplicity for a stunning backyard transformation.
Master the art of yard clean-up and removal with a fashionable, minimalist approach.
Decluttering your outdoor space can be as stylish as it is functional.
Garden organization isn’t just practical—it’s your backyard’s latest fashion statement!
Let your outdoor space reflect the effortless, chic, and serene vibe of California living.
What to wear—the importance of a thoughtful, functional wardrobe.
Tackling Outdoor Decluttering for Yard Clean-Up and Removal
Embarking on my spring cleaning outdoors, I’m channelling a touch of Jenni Kayne’s lifestyle—sleek, functional, and utterly beautiful. It’s time to tackle the chaos: fallen branches that seem to think they own the place and old planters that haven’t seen a bloom in years. Let’s say goodbye to the remnants of autumn’s past and turn my outdoor living space into a splash page from a high-end catalog—spacious, stylish, and superbly organized.
The plan? We’re not just tossing out the old; this is outdoor decluttering with intention. I’m curating my exteriors with the eye of a gallery owner—everything in my garden will earn its place or make its way to the yard waste bin. Every snip, sweep, and sort is my brushstroke on this verdant canvas.
Imagine a serene backyard tableau where yard clean-up and removal uplift the environment aesthetically and spiritually. The blend from inside to out will be seamless, a duality of spaces that play in harmony. Who knew your garden’s seasonal refresh could be this cultivated and this inspiring? But how do you get there?
For starters, take these three simple steps:
Inventory the outdoor scene—note what stays and what goes
Address the biggest eyesores first for an instant uplift
Implement a new rule: for everything new that comes in, something old exits stage left
Patio Ponderings
As you dive into the great outdoor tidy-up, don’t forget to take mindful breaks. Admire your handiwork and the journey it represents. For me, this is more than just cleaning; it’s reclaiming my self-esteem. Mr. Ex had a knack for diminishing my efforts, even during the pre-divorce days. My DIY victories, like sprucing up the patio, were often met with his ‘improvements’ – undoing my work or replacing it under the guise of ‘bettering’ things. His actions were a subtle way of saying my efforts didn’t count. But here’s the deal: they do. So, when you’re done with your project, take a moment to bask in the glory of your accomplishment. It’s your hard-earned victory. And as for any Mr. Ex out there trying to overshadow your achievements? Well, let’s just say they can take their opinions and… you know where they can stick them.
As I lay down plans for plants and pathways, my yard clean-up and removal mission shapes up to be no ordinary foray into foliage and outdoor tidbits. This is a statement—a declaration that while this mom might sometimes struggle to find matching socks, her backyard will reflect nothing short of an outdoor sanctuary, thoughtfully and wittily composed.
Diy spring clean-up
Garden Organization Like a Pro: DIY Tips and Tricks
As a sartorial gardener, I believe that the elegance of garden organization rests not just in the blooms but also in the methodology. My fashion-forward approach—think of it as the Jenni Kayne of yard tidying—transposes the classic California chic to the great outdoors. Thus, with my trusty flats patting the earth, a sweater hugging my shoulders, and high-waisted pants that say, “I mean business,” I narrate the tale of turning my backyard brigade into a DIY ballet.
Let’s cut to the chase: this isn’t mere yard tidying; it’s a craft. The DIY tips that flow forth are whispers from the very soil I nurture, each whisper transforming into a shout of triumph as my garden edges towards perfection. So, kindly step aside garden gnomes, for it’s time to orchestrate this green space into a topiary of taste and functionality.
Creating zones for meditation, play, and entertainment—just like the well-defined areas in a farmhouse living room—.
Fashioning a compost corner that feels less like a bin and more like a rustic retreat for transforming yesterday’s scraps into tomorrow’s treasures.
Utilizing vertical planters—canvases that climb—creates art with ivy and herbs.
Each task, a brushstroke, into the garden, I delicately instill essence and ethos, until every leaf and petal sits in silent acknowledgment of its role in this curated exterior mosaic.
Dressing Like a Pro (Or at Least Like Someone Who Won’t Lose Their Pants)
This gal takes her gear seriously!
Let’s talk garden gear for tackling that yard. You know, the place where plants go rogue and dirt is the ultimate accessory. My outfit checklist? Think less fashion runway, more ‘I-can-bend-without-mooning-the-neighbors’.
First up, high-waisted pants, the unsung heroes of the yard work world. They stay put, people! That means no awkward yanking up of your britches with hands that have just had a date with mud. Plus, pockets! Because when you need to stash that random tool or a surprise garden critter (don’t ask), you need ’em handy.
Layering is key. I rock a cozy knit sweater that screams ‘chic gardener’ (or at least I like to think so) over a basic tee. Why? Because spring weather is as unpredictable as my ex’s alimony payments. Warm in the sun, chilly in the shade—the sweater’s there for you.
Boots. Not just any boots, but quality leather work boots that can survive at least two years in the trenches (or garden beds). A touch of toughness can be sexy if you know what you’ve got. Just sayin’. I keep the laces loose to easily slip on and slip off; it’s the little things in life. Plus, I’m OCD as all hell when it comes to dirt on my floor.
Sunglasses—the good kind that don’t take a nosedive every time I look down. And ones that don’t get tangled in my hair when I’m having a ‘push them up to think’ moment.
Gloves—qualityleather with a proper. Goldilocks-style: not too big, not too small. Because nothing says ‘yard work warrior’ like a pair of gloves that mean business.
So that’s my yard clean-up couture. Less about making a fashion statement, more about not being defeated by your own clothing mid-weed pull when you’re standing there with your ass-crack showing and a mini tummy roll hanging over your pants when Mr. and Mrs. Rocio walk by for their daily stroll, the ones with the newly divorced smoke show of a son.
Yard Cleanup and Removal: Where to Start and How to Finish
Staring out at my backyard, I’m reminded of an artist before a blank canvas, except my art form happens to be yard clean-up and removal. With a mind for minimalism and a heart for the homestead, it’s time to transform this chaotic tableau into a haven of simplicity. Let’s strip away the unnecessary while curating a space that is both nurturing and neat. But where to begin?
Identifying Yard Work Priorities
Just like Jenni Kayne decides what fits in her ethereal Californian spaces, I must choose what’s crucial for my outdoor oasis. Prioritizing tasks isn’t just a matter of ‘to-do’ or ‘not to-do’; it’s about shaping the yard’s character. The unruly bush that’s hogging up the view? The tools are lying around as if they’ve claimed squatter rights. Yes, they get the first tickets to Transformation Town. Each decision is intentional, ensuring that the yard tidying process is an elegant march towards functionality and finesse.
Embracing garden health with eco-friendly outdoor decluttering
Safe Waste Removal and Eco-friendly Practices
As custodians of our miniature patches of earth, eco-friendly practices in waste disposal are paramount. Hence, composting becomes my secret garden alchemy, turning yesterday’s yard waste into tomorrow’s black gold. It’s about making peace with the land, crafting an ecosystem within the yard, and ensuring that outdoor decluttering doesn’t cost the Earth her dues.
Time-saving Techniques for Busy Moms
In the throes of motherhood and amid a schedule that’s tighter than a new pair of jeggings, efficiency is queen. Adopting time-saving techniques for yard tidying means more time for what truly matters—like savoring that cup of coffee before the morning melee begins. Group similar tasks, declutter systematically, and watch as the yard becomes a reflection of practical beauty, all without missing a single soccer game or piano recital.
In short, this makeover is personal. It’s a stylish revolution, one wheelbarrow at a time. And as my backyard emerges from its chaotic cocoon, know that each twig picked and each leaf raked is more than mere yard clean-up. It’s the embodiment of care, crafting a space where memories can be made amid the majesty of manicured lawns and mindfully curated corners.
Unveiling the Secret to Efficient Yard Tidying
Unlocking the secret to efficient yard tidying is like finding that missing sock in the laundry—unexpectedly satisfying. We’re cutting through the typical garden jargon to give you straightforward, practical advice that actually makes a difference. It’s about turning your backyard battleground into a serene, tidy haven with a few clever moves and the right attitude. Let’s ditch the mystery and make your outdoor space look less like a wild safari and more like a manicured oasis.
The Right Tools for the Job: My Arsenal for Backyard Battles
Aftermath of a diy yard clean-up battle: conquered and proud!
First, let’s talk about weaponry for this garden warfare. You need tools that don’t just look good but work hard—like a well-aged George Clooney—for your yard.
Heavy-Duty Garbage Bags: None of those flimsy things that tear when you look at them wrong. We need bags that can handle a surprise root or a rogue branch.
Rugged Garden Gloves: Think of them as your hand’s bodyguards against thorns, splinters, and that unknown gooey thing.
Trusty Rake: For gathering leaves, twigs, and your thoughts as you ponder why you thought a maple tree next to the pool was a good idea.
Sharp Pruning Shears: For when you need to channel your inner Edward Scissorhands and get those bushes under control.
Loppers: Again, make sure all of your tools—in fact, anything with a blade—are freshly sharpened.
Bonus Tip: That includes your lawn mower. Every spring, I take mine in for a tuneup and have the blade sharpened. It’s about $75 all-in.
Wheelbarrow or Garden Cart: Your loyal steed for hauling everything from mulch to your exhausted self by the end of the day.
Strategies for Segmenting the Work: Divide and Conquer
Alright, let’s slice and dice this yard work into manageable pieces—think of it as meal-prepping, but for your garden.
Start with the big stuff: Tackle large debris first—fallen branches, last season’s failed DIY project, whatever Mr. Ex left behind. Throw it in the trash, where it belongs. This is helpful to do before the next step because you’ll most likely have to work around bulk pick schedules, so you don’t have a load of crap sitting on your front curb for a month. There’s always a Karen who will call the town and have them issue a summons; no matter where you live, there’s always one.
Zone Your Yard: Break it down like a dance routine: front yard, back yard, side yard. Give each zone their moment in the spotlight and your full attention until you can mark it off the list and don’t stray from your plan.
The Great Leaf Massacre: Rake first, then bag. It’s like a yard version of ‘eat dessert first’, but with more sweat and less sugar.
Prune Like a Pro: Focus on one bush, tree, or plant at a time. Give it a haircut, a pep talk, and move on.
Final Walkthrough: Like a general survey of the battlefield, do a final check. Missed spots are like that one sock that always disappears in the laundry—elusive but important.
As you can see, it’s not rocket science, and even the seemingly biggest tasks could be broken up into manageable zones or mini-zones. Let’s get those yards looking less like a ‘before’ picture and more like a place where you’d actually want to spend a sunny afternoon or host a late night with close friends by the firepit without having to worry about land mines and lawsuits.
Implementing a Yard Maintenance Schedule
Choreographing the tango of tasks into a harmonious yard maintenance schedule is my encore. Juggling soccer practices and client meetings, I etch out a tempo for trimming and toiling that interlaces seamlessly with the rhythms of my day-to-day. This isn’t mere maintenance; it’s lifestyle synchronization—a nod to the moms who caress the earth and caress the clock with equal finesse. This is what works for me, but tailor it to a schedule that you can make yourself stick to. Procrastination only makes things harder, eventually becoming overwhelming, so if you’re going to DIY, that means you have to actually do the work, not just say you will, then keep putting it off like a New Year’s resolution.
Day
Task
Tool of Trade
Monday Mornings
Pathway Sweeping
Sturdy Broom
Wednesday Evenings
Community Composting
Trusty Spade
Friday Fun
Flower Bed Finery
Dexterous Pruners
Sunday Sun-Up
Lawn Luxuriating
Reliable Mower
And so, with an artful twirl and a grounded step, the session of outdoor decluttering concludes—my botanical realm now exudes an air of tranquility and tasteful tailoring. Who said efficient yard clean up and removal had to be mundane? Certainly not I, the matriarch of mulch!
Diy spring clean-up
Transform Your Outdoor Space: Creative Remodeling Post-Clean Up
The post-yard clean-up and removal phase is akin to a painter standing before a blank canvas; it’s where my inner stylist dovetails with creative remodeling instincts. With the tidying done, it’s time for the outdoor space transformation. Imagine the soft twinkle of fairy lights over a new deck, the chic silhouette of modern outdoor furnishings against the twilight, and the alluring charm of a fire pit where stories await to be told. This yard won’t be just a space—it’s the blueprint of my creative manifesto, the very depiction of al fresco living that would have Jenni Kayne raising her glass in approval.
In my mind’s eye, each corner of the yard becomes a tableau, eagerly anticipating its adornment. An herb garden here, a water feature there—the choices are exhilarating and endless. From pathways lined with LED solar lights to repurposed wine barrels doubling as rustic planters, I’m set to weave standout elements that scream less yard work and more yard play. The result? A backyard metamorphosis that is nothing short of a personal paradise.
Outdoor seating arrangements are envisioned not just for rest but for the effortless art of social symphony.
A DIY pergola: conjuring images of vine-wrapped Italian villagios right in my abode.
Stylish dividers and screens: creating cozy nooks where solitude and serenity are the cherished guests.
Fascinated by the whimsy of transformation, I’m crafting a setting where family and friends converge, a haven reflecting the sophistication and nature-inspired palette of Jenni Kayne designs. It’s a journey from bare to flair, where each selection, from pebble mosaic walkways to ambient lighting, is a deliberate stroke on this ever-evolving masterpiece called home.
Before Transformation
Creative Remodeling Touch
After Transformation
Plain Patio
Installation of a market-style light canopy
Glowing Evening Retreat
Empty Garden Beds
Integration of perennial botanicals
Year-round Color Burst
Unused Corner
Introduction of a cascading water feature
Soothing Aquatic Corner
Basic Grass Lawn
Creation of a flagstone pathway with thyme joints
Enchanted Garden Walk
Through selective pruning and tasteful additions, less becomes substantially more. My yard clean-up and removal efforts bloom into a rewarding approach to exterior design. It’s not just about landscaping; it’s about land-loving—where every inch invites interaction and introspection, every furnishing echoes my persona, and where functionality meets finesse under the open sky. Brace yourself, backyard—you’re about to get Kayne’d.
Ensuring Sustainable Waste Removal and Garden Health
Inspired by the ethos that Jenni Kayne infuses into her lifestyle brand, I commit to a backyard cleanup that honors the same reverence for nature’s grace. As I contemplate the quiet beauty of my garden, I pledge to uphold a sense of stewardship that aligns well with principles of sustainable waste removal and eco-friendly practices. It seems only fitting that the soil nourishing my blooms reflects the life cycle and sustainability so evidently cherished on Kayne’s sprawling ranch.
Composting Organic Yard Waste
Embracing the transformative power of composting, I turn organic yard debris into a goldmine of nutrients. This alchemical process not only enriches the soil of my garden, fostering robust garden health, but also epitomizes the eco-friendly yard cleaning ethos I’ve come to hold dear. Each fallen leaf and spent bloom finds its way into the compost pile, assured of a meaningful reincarnation.
Choosing Eco-Friendly Yard Cleaning Products
The Weed Whacker: This all-natural weed killer is a blend of vinegar, salt, and a dash of dish soap. It’s like a magic potion for your garden, minus the harmful chemicals. Plus, the satisfaction of whipping up your own concoction? Priceless.
Grass-Gone-Green: This organic lawn fertilizer is not just for show; it actually works. Composed of composted chicken manure (don’t cringe, it’s gold for the garden), it turns your lawn into a lush, green oasis. It’s like giving your grass a green smoothie, only it’s not overpriced.
Bug-Off Bliss: Ditch the DEET! This natural insect repellent made from essential oils not only keeps the bugs at bay but also makes your yard smell like a spa retreat. Lavender and lemongrass scents waft through the air—it’s a backyard nirvana.
Eco-Enzyme Elixir: This is a DIY miracle worker for your plants. Made from fermented fruit scraps, this elixir is the ultimate in recycling. It boosts plant growth and health, proving that your kitchen waste is a treasure trove for your garden.
Rainwater Rhapsody: A simple rain barrel setup. Collecting rainwater is like having a savings account for your garden. It’s sustainable, reduces your water bill, and plants love it. Plus, positioning it under a gutter is a DIY task even I can handle—take that, Mr. Ex!
Protecting Wildlife During Yard Cleanups
With a firm belief in coexistence, my yard clean-up and removal efforts take a pause to consider the flutter and scurry of local wildlife. Safe havens in the form of birdhouses pepper my yard’s periphery, while pollinator-friendly plants are nestled into corners with intention. In this small urban oasis, I foster a haven for all creatures, honoring the deeply intertwined relationship between style and nature’s uninhibited spirit.
Each deliberate action in my backyard ballet aligns perfectly with a sustainable waste removal narrative—that of a landscape not just lived in but lovingly partnered with, where protecting wildlife and nurturing garden health bear equivalent significance to the aesthetic appeal. And thus, the garden thrives, a testament to both beauty and responsibility.
How Much Does It Cost to Hire Someone?
When the spring sun shines on the aftermath of winter, a yard clean-up becomes inevitable. But before you consider dialing up the professionals in 2024, let’s talk costs. The days of snagging yard services for a steal are behind us. Even the most basic spring yard spruce-up starts at around $500 and depending on a number of factors, the figure can climb up to a hefty $2,000.
It’s essential to know that this price range is just the beginning. The full spectrum of services—like precision tree trimming, mulching, tree removal, or some form of maintenance contract—all come at additional costs. Each adds a layer to the financial foliage of yard care expenses.
For those weighing the DIY approach against professional services, this is your quick glimpse into the financial commitment you might be looking at. And if these numbers have your budget-conscious heart skipping a beat, why not dive into our comprehensive guide, Backyard Budget 2024: Yard Cleanup Cost Revealed? There, we break down the expenses and provide exclusive insider tell-all negotiation tips and tricks. You see, Mr. Ex. has been a landscape contractor for 25 years, so I know all about the most effective pressure points when it comes to creating leverage in your negotiation strategy.
Conclusion
From the unruly overgrowth to an elegantly orchestrated backyard oasis, my journey of DIY yard clean-up, including junk removal and debris removal, stands proudly completed. But this transformation is more than merely seasonal—like a well-tailored suit, it’s about the continuous refinement and care that only devotion can nurse. The philosophy of Jenni Kayne’s streamlined Californian aesthetic, paired with the ethos of an eco-conscious garden organization, has melded to fashion an outdoor environment that is both chic and sustainable.
Tackling outdoor decluttering, my weekends have woven a story of accumulated leaves transformed into rich compost and of dead branches turned into cozy fireside hearths—all in reverence to the functionality and simplicity that guide my hands. As I surveil my domain, the satisfaction derived from neat hedges and blooming beds echoes the joy found in a day’s hard work, reminding me that every backyard needs its matriarch to thrive and flaunt its seasonal couture.
In this alchemy of yard revival, I’ve grasped that true freedom resides in the orderly and the deliberate. So to those who embark on this crafted path of outdoor rejuvenation, may you find your rhythm in the rustle of leaves and the whisper of the wind. Here’s to the dirt under our nails, the soil in our skin, and the lush canvas of life that we create and curate—with mindfulness entwined with nature’s unfaltering rhythm. After all, is there any greater triumph than the fulfillment of tending to Earth’s splendor, embodying the marriage of motherhood and mother nature?
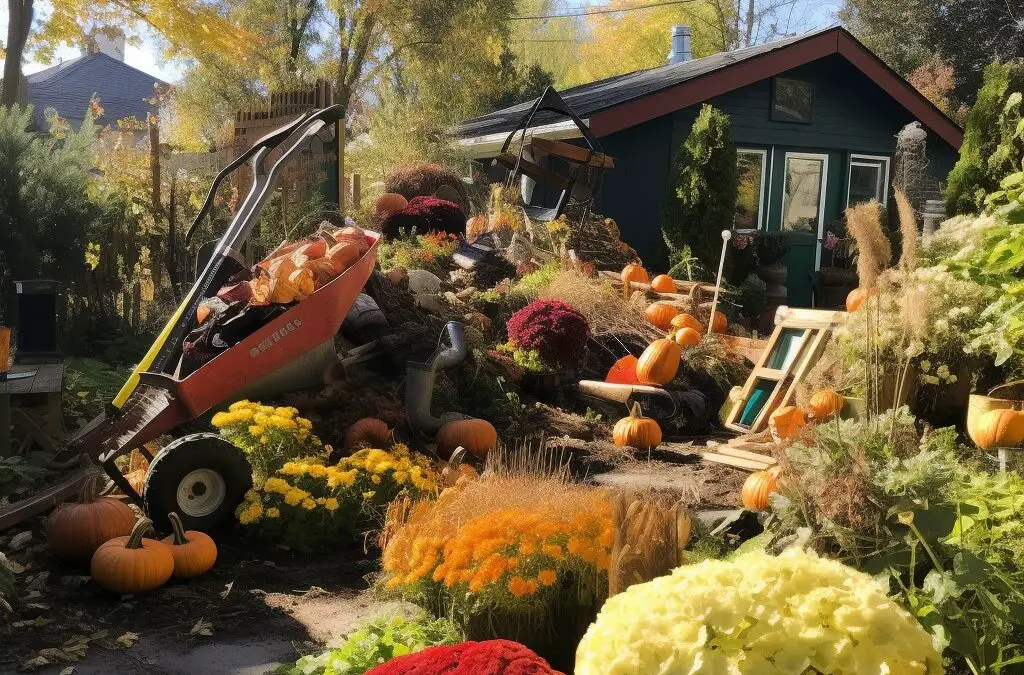
As a single mom and the voice behind Mom Versus the World, the fall garden cleanup has been my jam the last few years. The crisp air, the fiery foliage, and the sweet promise of putting my chaotic garden to rest. But let’s face it, fall garden cleanup is the unsung hero that paves the way for that springtime garden glow-up.
As we dive into the fall cleanup, there’s a smorgasbord of tasks awaiting us. From the leafy avalanche to the perennial pruning party and the ever-important defense against those pesky winter pests. It might sound overwhelming, but trust me, with a sprinkle of planning and a dash of elbow grease, it’s a transformative ritual that’s oddly satisfying.
In this guide, I’ll spill the tea on my fall garden cleanup escapades. We’ll chat about the perennials that need a little TLC and how to prep your green oasis for its winter slumber. So, pour yourself a drink (or a mocktail, if you’re on my wavelength) and let’s dive into the dirt.
From leaf management to perennial pampering, the cleanup is a mixed bag of tasks.
A sprinkle of planning can turn the daunting cleanup into a rewarding ritual.
The Fall Garden Cleanup: DubG’s Deep Dive
Being the face of Mom Versus The World has taught me a thing or two about rolling with the punches, and fall garden cleanup is no exception. It’s a dance that requires finesse, but with some insider tips, you can waltz through it.
Firstly, let’s address the leafy elephant in the room. Raking leaves might seem like a Sisyphean task, but here’s a plot twist: some leaves are actually your garden’s BFF. That’s right, they offer a cozy blanket for overwintering critters and, when mulched, become a nutrient-packed treat for your soil. Just remember, moderation is key. A leaf carpet is chic, but a leaf mountain? Not so much.
Now, let’s talk compost. Fall is your golden ticket to start that compost pile you’ve been daydreaming about. It’s like a garden smoothie—a blend of “brown” leaves and “green” goodies that decompose to create garden gold. And for my fellow perennial lovers, resist the urge to give them a drastic haircut. Many of our buzzy friends, like bees and butterflies, cozy up in those stems for winter.
Vegetable gardeners, listen up! Clear out any sickly plants and decomposing debris. We don’t want any uninvited pests crashing our spring garden party. And while you’re at it, give your soil a protective mulch blanket or consider sowing a cover crop.
A rookie mistake I’ve made? Mowing my lawn too short. It’s like giving your lawn a buzz cut when all it wanted was a trim. Keep those mower blades high for the season’s final cut. And for those with a penchant for bulbs, fall is your planting playground. Daffodils, crocuses, and grape hyacinths are not only a treat for the eyes but also an early nectar source for our bee buddies.
To wrap it up, fall garden cleanup is more than just a chore; it’s a labor of love. With these tips in your arsenal, you’re set to strike that perfect balance, making both your back and your garden thank you. Cheers to a fabulous fall cleanup!
Mom Versus Leaves: The Leafy Showdown
Every fall, it feels like me (DubG) versus a gazillion leaves. The battle is real, folks, but the silver lining was that my arms and core became amazingly sculpted last year because my ex refused to let me borrow his leaf blower and steel rake. . So this year, I’m flipping the script; I’m harnessing the power of fallen leaves.
Composting the Fallen: DubG’s Green Gold Recipe
Composting is the garden magic we all need. If you’re not turning those fallen leaves into compost gold, you’re missing out. This season, I’m championing the compost cause. By layering “brown” leaves with “green” materials, I’m crafting a nutrient-rich concoction that’s pure garden elixir.
But wait, there’s more to leaves than just compost. Strategic leaf piles can be nature’s insulators, offering refuge to critters and pollinators bracing for winter. However, a word of caution for my fellow lawn lovers: don’t let those leaves smother your grass. A leafy sprinkle? Fabulous. A leafy avalanche? Not so chic.
In my past life, I might have banished all fallen leaves to the dump. But this year, I’m embracing their potential. From composting to crafting critter-friendly nooks, I’m turning the leafy onslaught into a garden win.
The Green Carpet Chronicles: DubG’s Lawn Lore
Juggling life as a single mom and the brains behind Mom Versus the World has given me a unique perspective on garden care. Fall is our cue to prep and pamper our gardens for the seasons ahead. Whether it’s sharpening those mower blades or feeding our lawns with nutrient love, I’m here to guide you through the green carpet chronicles of fall.
Mower Blade Massacre: DubG’s Lawn Lessons
Before Jack Frost starts nipping at your nose, it’s crucial to give your lawn that final, loving mow. But hold up! Before you rev up that mower, ensure that the blade is as sharp as my wit. A dull blade is like a bad breakup—it tears up the grass, leaving it vulnerable to all sorts of drama. I learned this the hard way, and let’s just say my lawn had a rough patch (literally). So, this season, I’m on top of my game, sharpening that blade for a pristine cut.
Nutrient Nourishment: Feed Your Lawn Like DubG Feeds Her Soul
Fall is the season of pumpkin spice and lawn nourishment. As the “Lawn Care Nut” preaches, it’s the time when cool-season grasses, like Kentucky bluegrass and ryegrasses, are gearing up for their winter siesta. So, I’m treating my lawn to a spa day, pampering it with Milorganite, and ensuring it wakes up next spring looking fabulous.
Weeding Out the Unwanted: DubG’s Garden Gatekeeping
Fall is also the season when those uninvited guests, like annual bluegrass and hairy bittercress, decide to crash the party. To keep these pesky intruders at bay, I’m rolling out the red carpet for prodiamine. But a word of caution: prodiamine is a bit exclusive and doesn’t let grass seeds grow. So, if you’re planning a lawn expansion, maybe skip the prodiamine this season.
And speaking of gatekeeping, if your lawn is already lush and thick, there’s no need to invite more seeds. Play defense, weed out the party crashers, and if your lawn looks a bit sparse, give it a Milorganite boost.
Perennial Pruning Party: DubG’s Garden Soiree
Being a single mom, author, and garden enthusiast, I’ve mastered the art of multitasking. And one task that’s non-negotiable? Keeping my perennial garden on point. The secret sauce? Deadheading those tired blossoms. It’s like giving your garden a facelift, ensuring it’s always ready for its close-up.
Trimming Time: DubG’s Guide to Garden Glam
Deadheading isn’t just a summer fling; it’s a season-long commitment. When is the best time to snip? When the flower starts looking like it partied a bit too hard,. The frequency of your deadheading dates depends on the flower’s stamina, which can vary from a one-night stand to a weeks-long affair. And just like dating, weather plays a role. A cool, rainy summer means your blooms will stick around longer, but a hot, dry spell? They’ll ghost you.
Choosing where to make that cut can be as confusing as choosing a Netflix show on a Friday night. But here’s the gist: prune the tired flowers and stems back to where a fresh bud or flower is waiting in the wings. If no new bloom is in sight, take it back to a leaf.
Deadheading Drama: DubG’s Blooming Chronicles
Many perennials, like the diva Shasta daisy, bloom even brighter with some deadheading love. And while deadheading can be therapeutic for some, for others, it’s a chore. My pro tip? Make it a daily ritual. A little snip here and there can extend your garden’s blooming season, making it the envy of the neighborhood.
And for my fellow garden enthusiasts, consider hosting a “Perennial Pruning Party.” Grab some friends, a bottle of wine, and make it a group activity. Trust me, it’s way more fun than flying solo. And while you’re at it, give your soil some TLC with compost and mulch. I’ve skipped this step before, and let’s just say my garden wasn’t pleased.
The Vegetable Vendetta: DubG’s Garden Grind
Being the voice behind Mom Versus The World, I’ve had my fair share of garden battles. Fall is the time to bid adieu to our green buddies and prep for winter. Here, I’ll spill the beans (pun intended) on my fall vegetable garden cleanup and sprinkle in some wisdom for the chilly months ahead.
Harvesting Havoc: DubG’s Garden Glow-Up
Kickstart your fall cleanup by bidding farewell to plant supports like bean stakes and tomato cages. A lesson from my playbook: clean them thoroughly before their winter hibernation. One year, I played it lazy, and my tomato cages turned into rusty relics. Now, I give them a thorough wipe-down or a bleach-water spa treatment to fend off diseases.
Next on the agenda is clearing out the garden beds. This includes the good, the bad, and the ugly—healthy plants, diseased ones, and old veggies. Healthy plant material gets a ticket to the compost pile, while the sick ones get the boot. Trust me, you don’t want last year’s drama to resurface next spring.
In conclusion, fall garden cleanup is like a therapy session for your garden. It’s a time to reflect, rejuvenate, and prep for the future. With these tips, you’ll not only have a garden that’s ready to face the winter but one that’ll bloom brighter come spring. Cheers to a fabulous fall and a garden that’s always on fire!
Planting the New Recruits: DubG’s Garden Bootcamp
After the grand farewell to the old plants, it’s time to roll out the red carpet for the new recruits. I usually pamper my soil with compost, manure, or other fancy fertilizers. It’s like giving the soil a spa day, rejuvenating it with nutrients and improving its texture. And if you’re feeling a bit adventurous, consider planting a winter cover crop like rye or clover. These crops are like the bouncers of the garden world, preventing soil erosion and adding some organic flair.
Timing is everything, darling. Start your garden’s winter prep right after the first frost sends those annuals packing. But if you spot plants throwing in the towel early, feel free to jumpstart your fall cleanup. As a single mom with a schedule tighter than my jeans after Thanksgiving, I always aim to be ahead of the game.
The Invasion of Insects: DubG’s Garden Horror Story
Every fall, as I gear up for my garden’s grand cleanup, I brace myself for the insect invasion. While some bugs are the life of the party, others are total party crashers.
Aphids, those tiny green menaces, have a knack for crashing my garden party. They’re like those clingy exes, sucking the life out of my plants. My go-to defense? Insecticidal soap or neem oil. But a word of caution: these can be a buzzkill for good bugs like ladybugs.
Then there are the sneaky spider mites. These tiny troublemakers are hard to spot, but their drama is unmistakable: yellowing leaves and spiderweb decor. A strong water spray is my weapon of choice, and sometimes I call in the big guns: predatory mites.
But remember, not all bugs are bad news. Some, like ladybugs and praying mantises, are the unsung heroes, keeping those pests in check. So, before you go all Rambo on the bugs, remember that some are on your side.
The Mulch Madness: DubG’s Garden Makeover
Fall’s here, and it’s makeover time for the garden. Mulching is like giving your garden a fresh coat of makeup. It not only beautifies but also shields your plants from winter’s icy stare.
This year, I’m going all out. I’ve had my share of mulching mishaps in the past, but this time, I’m armed with knowledge and a truckload of mulch. Choosing the right mulch is key. Some, like wood chips, can be drama queens, while others, like straw, can attract unwanted guests.
The Compost Conspiracy: DubG’s Garden Whodunit
Every year, I feel like there’s a plot against compost. I mean, I put in all this effort, and the pile just sits there, mocking me. But this year, I’m cracking the compost code.
Sunlight is the secret ingredient. Too much shade and the compost plays hard to get. And those leaves? Shred them before adding them to the pile. Trust me, it speeds up the process.
The Battle of the Bulbs: DubG’s Garden Showdown
Planting bulbs in the fall feels like a game of strategy. And let’s be real, sometimes the bulbs play hard to get. But with a bit of prep and some TLC, you can set the stage for a springtime spectacle.
In the past, I’ve been a bit casual with my bulb planting. Dig a hole, drop the bulb, and hope for a spring miracle. But now, I’m all about that prep life. Enriching the soil, planting at the right depth, and choosing the right bulbs are all part of the game plan.
Daffodils are my go-to because they’re not just pretty; they’re also deer-resistant. Tulips are gorgeous but watch out; they’re like candy for squirrels and we have psycho squirrels around here, no joke. And for that early spring pop of color, crocuses and hyacinths are my top picks.
So, as I gear up for this year’s Battle of the Bulbs, I’m armed with knowledge, determination, and a vision to one day have the best garden in the neighborhood. Right now, my kids will be the first to tell you that our house is number two.
The War Against Wildlife: DubG’s Garden Chronicles
Ah, the joys of gardening. Birds serenading, butterflies fluttering, and… wait, did that squirrel just make off with my last tomato? Welcome to my world, where the garden isn’t just a place of beauty but a battleground against nature’s little marauders.
Bird netting? Check. It’s like the VIP rope at a club, keeping the uninvited out. It’s amusing watching birds try to figure out this garden enigma. Deer spray? It’s like the perfume you wear that some people love and others don’t. And scarecrows? More like garden decor than an actual deterrent. As for my pond, it’s not a froggy free-for-all. A good net keeps those amphibian party crashers at bay.
But let’s talk raccoons. Those masked bandits once turned my shed into their personal Airbnb. It was not a five-star experience for me.
The Seed Struggle: DubG’s Garden Dilemmas
Fall cleanup is like trying to organize a toddler’s playroom while they’re still playing. Seeds everywhere, leaves carpeting the ground, and me, trying to find a balance between a tidy garden and a bird buffet.
Those seeds? They’re not just garden leftovers; they’re a gourmet meal for our feathered friends. And the leaves? Nature’s blanket, offering shelter to critters and enriching the soil. So, while I might be tempted to rake and bag, I’ve learned to embrace the beautiful chaos.
And speaking of chaos, let’s talk about brush piles. They’re like the condos of the garden world, offering shelter to birds and other wildlife. Plus, it’s a great way to recycle those fallen branches.
Every year, as fall approaches, my garden turns into a scene from a reality TV show, “Garden’s Got Talent.” The contestants? My shrubs, each vying for the spotlight.
The burning bush, with its fiery fall foliage, is like the diva of the garden. Gorgeous, but high maintenance. Then there’s the boxwood, the reliable friend who’s always there. I thought there was no drama, until this year one of them got a bug, so we had to do some fast-thinking recon, but the battle has been won!!!
So, how do I keep the peace in this garden showdown? Strategic pruning, a touch of mulch, and a watchful eye for pests. And when winter’s icy fingers reach out, a little protection goes a long way.
In the end, every shrub has its moment to shine. And me? I’m just a marksman with my sniper insecticide rifle, waiting for the next foolish little pest to try me for size.
The Plant Protection Program
As a gardener, I know that the fall season is the perfect time to start thinking about protecting my plants. The Plant Protection Program is my go-to guide for ensuring that my plants stay healthy and strong throughout the colder months.
First and foremost, I make sure to remove any dead or diseased plants from my garden beds. This not only helps prevent the spread of disease, but it also frees up space for new plantings. I also take the time to prune any overgrown shrubs or trees, which helps promote healthy growth in the spring.
When it comes to planting new trees and shrubs, I always make sure to choose varieties that are hardy enough to withstand the cold winter months. I also add a layer of mulch around the base of each plant to help insulate the roots and protect them from freezing temperatures.
Cover crops are another important part of my plant protection program. These crops help prevent soil erosion and add valuable nutrients to the soil, which can help improve the health of my plants in the long run. This year, I plan on planting a mix of rye, clover, and vetch to help keep my soil healthy and fertile.
Finally, I always make sure to provide adequate support for my plants. This includes staking tall plants and using cages to support vines and other climbing plants. By providing the right support, I can help prevent damage from high winds and heavy snowfall.
In the past, I’ve made plenty of mistakes when it comes to fall garden cleanup. I’ve neglected to remove dead plants, failed to provide adequate support for my plants, and even planted the wrong varieties for my climate. But by following the Plant Protection Program, I’ve been able to avoid these mistakes and keep my garden healthy and thriving year after year.
So let’s review…
Step 1: The Great Garden Clean-Up. Dead or diseased plants? Out you go! It’s like the Marie Kondo method but for plants. If they don’t spark joy (or life), they’re gone.
Step 2: Pruning Party. Overgrown shrubs and trees get a little trim, ensuring they strut their stuff come spring.
Step 3: Mulch Madness. A cozy blanket of mulch around my plants keeps their roots snug and warm. It’s like giving them a little hug.
Step 4: Cover Crop Carnival. Rye, clover, vetch—oh my! These crops are the unsung heroes, enriching my soil and prepping it for next year’s garden gala.
Step 5: Support Squad. Stakes, cages, and other supports ensure my plants stand tall, come wind or snow.
The Checklist Challenge: DubG’s Fall Garden To-Do List
Every fall, I face the ultimate challenge: the garden checklist. It’s like an obstacle course, but instead of mud and ropes, there’s soil and plants.
Clear Out: Dead plants, you’ve had your time. Make way for the new!
Prune: It’s like giving my plants a fresh new haircut.
Weed War: Hand-to-weed combat. It’s a thing.
Divide & Conquer: Some plants just need their own space.
Soil Spa Day: A little compost, some manure, and voila! Happy soil.
The key? Take it one step at a time. And maybe, just maybe, with a glass of wine in hand.
Conclusion
Gardening, like life, is full of ups and downs. But with a little preparation and a lot of love, we can weather any storm. As the author of Mom Versus The World, I’ve faced my fair share of challenges, both in the garden and out. But with every fall cleanup, I’m reminded of the beauty of new beginnings. So here’s to fresh starts, happy plants, and a garden that’s ready to face whatever Mother Nature has in store. Cheers!
Fall lawn maintenance: As a single mom and author of Mom Versus the World, I’ve made my fair share of DIY mistakes. One area where I’ve struggled in the past is lawn care. I used to think that simply mowing my lawn every week was enough, but I soon realized that it takes more than that to keep my lawn looking lush and green.
That’s why I decided to try overseeding my lawn in the fall. I had heard that it was a great way to fill in any bare spots and improve the overall health of my lawn. After doing some research and consulting with a lawn care expert, I learned that overseeding is a simple process that can have big results.
In this article, I’ll share my experience with overseeding and provide tips on how to do it properly. From choosing the right grass seed to watering and fertilizing, I’ll cover everything you need to know to get your lawn looking its best. So grab a margarita (or a glass of water, if you’re like me) and let’s get started!
Key Takeaways
Overseeding in the fall can improve the health and appearance of your lawn.
Choosing the right grass seed and preparing your soil are keys to success.
Proper watering, weeding, mowing, and fertilizing are essential for maintaining a healthy lawn.
Why Your Lawn Looks Like MY Ex’s Balding Head
The Tragic Irony Of Sparse Lawns
So, fun fact: my ex runs a landscaping gig. Mostly about laying fancy stones, but he dabbles in the whole green scene too—sod, shrubs, the works. My entire gardening journey? A not-so-subtle attempt to make my yard the envy of his. A little petty? Absolutely. But hey, if my lawn can outshine his, that’s a win in my book. However, Mother Nature had other plans. Between last year’s drought and this year’s monsoon, my lawn’s been through the wringer. Stepping out, it’s like staring at my ex’s receding hairline. Sparse, patchy, and a shadow of its former glory. But here’s where the plot twist comes in: I can fix my lawn.
Feeling like your lawn’s seen better days? Join the club. There’s a laundry list of reasons why your grass might be on the thin side:
Crappy soil
That big ball of fire in the sky playing hide and seek
I’ll admit, I’ve had my fair share of DIY blunders that did my lawn no favors. For example, always read the package. I bought 2 different types of mosquito spray this year (whatever was on sale): Cutter, Lawn and Yard Spray and Off Yard Spray. I read Cutter thoroughly, which gave instructions for spraying the lawn, especially in shaded areas for the pesky blood sucking creepers, but Off, I figured was the same. It was not. Yeah, so I did a boatload of damage, including to the new section of sod I put down in the spring for my son, like a mini soccer field (he wants to be Cristiano Ronaldo) .
So, now, I’m on a mission to repair, revive, and renew! and the trick to a green, renewed lawn is more sod… No, I’m kidding, I can’t afford new sod. The secret sauce to bringing back the lushness is overseed in the fall. It’s like giving your lawn a hair transplant. You’re basically sprinkling new grass seeds over the old, sad patches, hoping for a green miracle.
But hold your horses before you go all out with the grass-seed party. A few pro tips: Pick the right seed for your local weather and soil drama. Prep your lawn like you’re setting the stage for its big debut—mow it, clean it, pamper it. And for the love of all things green, water it like you mean it.
Follow the script, and soon, your lawn might just be the thick, luscious mane you remember. And who knows? it might even give you a run for your money in the hair department.
Choosing Your Grass Seed Like a Tinder Date
As a single mom, I’ve had my fair share of dating app experiences. And let me tell you, choosing the right grass seed is a lot like choosing the right Tinder date. You want something that looks good on paper, but also has the substance to back it up. Here’s what I mean:
Cool-Season Grasses
If you’re looking for a grass seed that can handle the cooler temperatures of fall, winter, and spring, then cool-season grasses are your match. Think of them like the nice guy who always shows up on time and never lets you down. Some popular cool-season grass types include Kentucky bluegrass and fescue. I live in New Jersey and these types of grasses work best for the Northeast, and the bluegrass/fescue is my personal favorite. The Kentucky Bluegrass brings a deep green color and is super soft on my toes. However, it won’t grow at all in the shade and sparingly in part shade, so you need a mix of fescue. I have actually considered cutting down all of the trees in my front yard, particularly when the leaves and itchy-balls fall faster than the crypto market after its monthly major hack, but I’m sure the local tree huggers would have a thing or two to say about that, so for now, we mix in some tall fescue. One more little note that is kind of annoying: Kentucky Bluegrass also takes the longest to germinate. When you seed at all, which ideally is in the fall or very early spring if you must, you cannot mow, rake, or use a super-powered blower for at least 2 weeks, but usually closer to 4. That tends to be a problem for my tidy yard OCD. If I weren’t poorer than a TV writer after their first residual check,.
Warm-Season Grasses
On the other hand, if you live in a warmer climate and want a grass seed that can handle the heat of summer, then warm-season grasses are your match. These grasses are like the bad boy who’s a little rough around the edges but always keeps things interesting. Bermuda grass is a popular warm-season grass type. It’s one of the few that can handle the heat, unlike my last sad excuse for a date.
Annual vs. Perennial Ryegrass
If you’re looking for a quick fix to cover up bare spots in your lawn, then annual ryegrass is like the one-night stand of grass seeds. It comes on really fast, looks good for a short period of time but ultimately doesn’t have the staying power. On the other hand, perennial ryegrass is like the long-term relationship between grass seeds. It may take a little longer to establish, but it will stick around for the long haul.
The Art of Overseeding: Not as Boring as It Sounds
As a single mom, I know a thing or two about mistakes, especially DIY mistakes, and I have the scars to prove it. But when it comes to overseeding my lawn, I’ve learned from my past blunders and am ready to share my knowledge with you.
Timing is Everything, Even for Grass
The key to successful overseeding is timing. You want to aim for early fall or late summer, when the weather is cooler and the soil is still warm enough to encourage seed germination. In my experience, waiting until the cooler temperatures of late fall can result in a patchy lawn come spring. In NJ, you’d want to wrap up overseeding by mid- to late-September. And if you can time it right after a substantial rain, like the one forecasted this weekend, even better.
Sowing Your Wild Grass Seeds
Once you’ve got your soil prepped and ready, it’s time to let it breathe. When it comes to sowing your grass seeds, there are a few things to keep in mind. First, make sure to mow your lawn short and remove any debris before seeding. This will allow the seeds to come into direct contact with the soil.
Next, consider using a seed spreader to ensure even distribution. I made the mistake of trying to hand-sow my seeds one year and ended up with clumps of grass in some areas and bare patches in others.
Finally, don’t be afraid to mix different types of grass seed for a more diverse and resilient lawn. Just make sure to choose seed varieties that are compatible with your climate and soil type.
With these tips in mind, overseeding your lawn can be a fun and rewarding DIY project. And who knows? Maybe you’ll even impress your neighbors with your lush and healthy lawn come spring.
Soil: It’s Not Just Dirt
As someone who has made numerous DIY mistakes in the past, I’ve learned the hard way that soil is not just dirt. It’s the foundation of a healthy lawn, and without good soil, your grass will struggle to grow and thrive.
The Importance of Good Soil
Before overseeding your lawn, it’s important to test your soil to determine its pH level and nutrient content. This will help you determine if your soil needs any amendments, such as lime or fertilizer, to create the optimal growing conditions for your grass.
In addition to testing your soil, it’s also important to make sure it’s not compacted. Compacted soil can prevent water, air, and nutrients from reaching the roots of your grass, making it difficult for it to grow. Aeration is a great way to loosen up compacted soil and create space for your grass to grow.
Aerate Your Lawn Like You Mean It
When it comes to aerating your lawn, don’t be shy. It’s important to make sure you’re creating enough space for your grass to grow, so don’t skimp on the aeration. The best time to aerate your lawn is in the fall, when the soil temperature is cool and the grass is in its dormant stage.
If you’re not sure how to aerate your lawn, there are a few different methods you can try. You can rent an aerator from a local home improvement store, or you can hire a professional to do it for you. Just make sure you’re creating enough space for your grass to grow, and don’t be afraid to get a little dirty in the process.
In conclusion, soil is not just dirt, and it’s important to take care of it if you want a healthy lawn. Test your soil, aerate it regularly, and make sure you’re creating the optimal growing conditions for your grass. With a little bit of effort, you can have a lush, green lawn that will make your neighbors jealous.
Watering: Not Just for Margaritas
As tempting as it may be to sit back and enjoy a margarita while your newly overseeded lawn grows, watering is a crucial step in the process. Without proper moisture, your seeds won’t germinate, and all your hard work will be for nothing. Trust me, I’ve made this mistake before.
I live in New Jersey, where the fall can be unpredictable in terms of rainfall. That’s why I always make sure to water my lawn regularly, especially in the first few weeks after overseeding. I aim for about an inch of water per week, either from rainfall or my trusty sprinkler system.
One mistake I used to make was watering my lawn too much, thinking that more water would mean faster growth. But too much water can actually drown your seeds and lead to fungal growth. That’s why it’s important to find the right balance and not overdo it.
To help keep track of how much water your lawn is getting, you can use a rain gauge or even just a simple tuna can. Place the can on your lawn while you’re watering and time how long it takes to fill up with an inch of water. This will give you an idea of how long you need to water your lawn to reach that sweet spot of one inch per week.
Another tip is to water your lawn in the morning, when it’s cooler and less windy. This will help prevent evaporation and ensure that your lawn is getting the most out of each watering session.
So, don’t neglect your watering duties when overseeding your lawn this fall. But, while you’re sipping that margarita, set a timer for your sprinklers. Cheers to a well-watered lawn!”
Weeding Out the Bad Guys
As much as I love the fall season, it’s also the time when weeds start to take over my lawn. It’s like they’re throwing a party and I wasn’t invited. But this year, I’m taking charge and showing them who’s boss.
First and foremost, I’m going to identify the weeds that are taking over my lawn. I’m not going to lie, I’m not a weed expert, so I’m going to use a handy guide to help me out. Once I’ve identified the weeds, I can figure out the best way to get rid of them.
One of the worst offenders in my lawn is crabgrass. It’s like the annoying neighbor who always shows up uninvited and overstays their welcome. I’ve tried pulling it out by hand, but it always seems to come back. This year, I’m going to use a pre-emergent herbicide to keep it from coming back.
When it comes to herbicides, I’m always a little nervous. I don’t want to harm my lawn or the environment, so I’m going to do my research and find the best herbicide for my needs. I’ll make sure to follow the instructions carefully and wear protective gear.
Overall, I’m excited to take on the weeds this fall. It’s time to show them who’s boss and get my lawn looking its best. Plus, it’s a great workout—pulling weeds is like a mini-arm workout. Who needs a gym membership when you have a lawn? So here’s to a fall season of overseeding, watering, and showing those weeds who’s really in charge. And if all else fails, there’s always that margarita.
Making The Cut
Look, as DubG, I’ve had my fair share of DIY disasters. But if there’s one thing I’ve nailed down (pun intended), it’s mowing. And no, it’s not just because I like the smell of freshly cut grass.
Typically, I keep the grass about 3 inches, but right before you overseed, you want to pop that blade down a notch and cut it about 2″, really the shortest you can go without ripping it completely out of the ground. Then rake the excess dried grass and you’re good to go.
Fertilizing: It’s Not Just for Farms
Another thing I’ve learned is that fertilizing is crucial for a healthy lawn, especially when you are using Kentucky Bluegrass, so right after you mow, throw down some fertilizer, preferable a 3-1-2 ratio, so something like 12-4-8, or even a 30-0-4, but make sure the middle is the lowest number and the first is the highest.
Not all fertilizers are created equal. You’ll want to use a starter fertilizer that has a higher concentration of phosphorus; that’s the first number, because that is what promotes root growth. One more key little trick I use is a product called Cytogrow. I bought this a while back (when I had $50 to spend) and it will last me a long time because you use so little. I apply it several times a year and every time I put down seed, fertilizer, or both. It’s a hormone biostimulant that increases root mass and stress tolerance, so basically its steroids’ for plants. And who ever said vegans don’t have as much muscle? What about Popeye, dude?
Anyhow, use a fertilizer spreader and a seed spreader, because, take it from me, if you don’t, you waste a ton of seed. I can’t afford one, so I used Mr. Ex’s bin the spring, but he isn’t talking to me since launched this blog. Crazy right? What’s his problem?
A spreader will ensure even distribution and prevent over-fertilization, which can actually harm your lawn. When you’re done, can I borrow that for a few?
Aftercare: Like a Spa Day for Your Lawn
Now that you’ve overseeded your lawn and watched it grow, it’s time to give it some TLC. Think of it like a spa day for your lawn—it’s been through a lot, and it deserves some pampering.
First things first, make sure you’re watering your lawn properly. The grass seedlings need consistent moisture to germinate and grow, so keep the soil moist but not waterlogged. If you’re not sure how much water your lawn needs, stick a screwdriver into the soil; if it goes in easily, you’re good to go. If it’s hard to push in, your lawn needs more water. If you start to grow mushrooms and get excessive use warnings from the water company, you may want to take it back a notch or five. Yup, I learned that one the really hard way too. I’m now on monthly installments for the next 6 months with NJ American Water Co. Oops
Don’t cut your grass; don’t rake or blow your leaves for at least 2–3 weeks, but more like 4–5 weeks. This is seriously one of the hardest parts for me, but don’t don’t do it!!!! Wait until it’s at least 3″, then you’re good to go. Otherwise, you will literally just rip it out or screw it up. After that hump, you’ll want to mow it regularly. But don’t go too short; you don’t want to shock the grass or expose the soil. Aim to mow when the grass is about 3 inches tall, and only cut off about a third of the blade. This will encourage healthy growth and a strong root system.
Speaking of roots, you want to make sure your grass is developing a deep, strong root system. This will help it survive the winter and come back strong in the spring. To encourage root growth, make sure you’re not over-fertilizing your lawn. Too much nitrogen can actually harm your grass and prevent root development.
Now, let’s talk about the weather. Fall is a great time to overseed because of the cool nights and mild temperatures. But as we get closer to the first frost, you’ll want to be extra careful with your lawn. If it gets too cold too fast, you can cover it with a frost blanket or straw to protect it from the cold, and make sure you’re not walking on it too much and make sure the kids and their friends aren’t practicing wheelys on your lawn because you have the softest grass. True story, those little…
And if all else fails, I’ll just blame the squirrels.
When Things Go Wrong: Lawn Care Horror Stories
As someone who has made plenty of DIY mistakes in the past, I’ve experienced my fair share of lawn care horror stories. Here are a few examples of what can go wrong when overseeding a lawn in the fall:
Bare Spots That Just Won’t Grow: Last year, I had a few bare spots in my lawn that I tried to fix with overseeding. Unfortunately, no matter what I did, those spots just wouldn’t grow. It turns out that the soil in those areas was too compacted, and the grass seeds couldn’t take root. I had to remove the soil and replace it with fresh topsoil before I could get any grass to grow.
Drought Destroys My Hard Work: Another year, I spent hours overseeding my lawn, only to have a drought hit a few weeks later. Despite my best efforts to water the lawn regularly, the grass seeds just couldn’t survive the dry conditions. I learned the hard way that it’s important to overseed your lawn when there’s a good chance of rain in the forecast.
Pests Take Over: One year, I noticed that my lawn was being destroyed by pests. I tried everything, from pesticides to natural remedies, but nothing seemed to work. It turns out that I had a severe infestation of grubs, and the only way to get rid of them was to use a specialized insecticide. The lesson here is to keep an eye out for pests and take action as soon as you notice a problem.
Disease Resistance is Key: When overseeding your lawn, it’s important to choose grass varieties that are disease-resistant. I made the mistake of overseeding with a variety that was susceptible to a common lawn disease, and my entire lawn was soon infected. It took months of treatment and care to get my lawn back to a healthy state.
Overall, overseeding your lawn in the fall can be a great way to improve its appearance and health. Just be sure to avoid the mistakes I made and take care to address any issues that arise.
Conclusion
Well, that’s all, folks! I hope you found this article on overseeding your lawn in the fall helpful. As a single mom and author of Mom Versus the World, I know firsthand the struggle of keeping up with lawn care and maintenance. But with a little bit of effort and some DIY know-how, you too can have a lush and beautiful lawn.
This year in NJ, I plan on overseeding my lawn to fill in any bare spots and improve the overall appearance. I’ve made plenty of mistakes in the past, but I’ve learned that proper maintenance is key to a healthy lawn. By following the steps outlined in this article, I’m confident that I’ll have a lawn that’s the envy of the neighborhood.
Remember, lawn care is a continuous process. It’s not a one-and-done deal. Regular maintenance is necessary to keep your lawn looking its best. So don’t be afraid to get your hands dirty and put in the effort. Your lawn will thank you for it.
In conclusion, overseeding your lawn in the fall is a great way to improve its health and appearance. By following the steps outlined in this article, you can achieve a lush and beautiful lawn that will make your neighbors green with envy. So get out there and start overseeding!
Manage your privacy
To provide the best experiences, we use technologies like cookies to store and/or access device information. Consenting to these technologies will allow us to process data such as browsing behavior or unique IDs on this site. Not consenting or withdrawing consent, may adversely affect certain features and functions.
Functional
Always active
The technical storage or access is strictly necessary for the legitimate purpose of enabling the use of a specific service explicitly requested by the subscriber or user, or for the sole purpose of carrying out the transmission of a communication over an electronic communications network.
Preferences
The technical storage or access is necessary for the legitimate purpose of storing preferences that are not requested by the subscriber or user.
Statistics
The technical storage or access that is used exclusively for statistical purposes.The technical storage or access that is used exclusively for anonymous statistical purposes. Without a subpoena, voluntary compliance on the part of your Internet Service Provider, or additional records from a third party, information stored or retrieved for this purpose alone cannot usually be used to identify you.
Marketing
The technical storage or access is required to create user profiles to send advertising, or to track the user on a website or across several websites for similar marketing purposes.