As winter wraps its frost-laden fingers around my neighborhood, I find myself once again donning the hat of an ice conqueror. Armed with steely resolve and a compendium of DIY de icing strategies, I brace for battle against the slippery foe. The quest for ice removal isn’t just a mundane chore—it’s an epic saga of winter ice control. With the pavement as my canvas, I craft a masterpiece of safe passage, turning the treacherous into the traversable. My arsenal? Home de-icing secrets that would make even an Eskimo take notes. So let’s not merely chip away at the subject—join me as we delve into the art of combating ice buildup without calling in the cavalry.
Key Takeaways
Develop a strategic ice removal plan to keep your domain slip-free.
Learn the ins and outs of winter ice control to face down any frosty challenge.
Adopt eco-friendly DIY deicing solutions, guarding your homestead and the planet.
Understand the importance of regular home deicing for safety and accessibility.
Arm yourself with knowledge to combat ice buildup on your property.
Acknowledge that timing is everything—know when to lay down the salt before the storm hits.
The Icy Adversary: Understanding Your Cold-Weather Foe
When the mercury plunges and the skies turn grey, my neighborhood transforms into a glistening, albeit treacherous, winter wonderland. Icy conditions underfoot turn every step outside into a potential dance with danger. But as your seasoned ice warrior, I’m here to guide you through understanding ice formation—the critical first step in our war against the challenges of cold weather.
To truly grasp our chilly nemesis, let’s take a cue from the spectacular ice ribbons found atop New Zealand’s glaciers. You see, ice isn’t just a homogenous hazard; it’s a complex character with several faces. Similar to the awe-inspiring but formidable ice caves that manifest from natural forces, the ice that forms near our homes is a result of environmental influences we must recognize to combat effectively. Winter hazards are much more than just an inconvenience; they can be downright perilous.
Breaking Down Ice’s Battle Plan
Initial Freeze: It all starts with water. A drop from a leaky gutter or a splash from a passing car lays the groundwork.
Temperature’s Role: As the frost point hits, that water begins its metamorphosis into ice, signaling the onset of hazardous conditions.
Winter hazards = winter whoops
Expansion and Friction: Icy surfaces expand and contract, reducing friction, which leads to increased slipperiness and accidents.
Hidden Threats: Beware the black ice—the ultimate stealth agent of winter hazards, nearly invisible and deceitfully dangerous.
Confronting Your Slippery Foe Up Close
Type of Ice
Formative Conditions
Risk Factor
Frost
Clear skies and declining humidity at dusk or dawn
By dissecting the various types and the anatomy of frozen precipitation, we lay the groundwork for victory. And, while we might not have control over the weather, we can arm ourselves with knowledge. My friends, understanding ice formation is akin to knowing the weak spot on a dragon’s underbelly—hit it there, and the beast of winter hazards doesn’t stand a chance.
As I prepare for this annual icy siege, I gather my wisdom like a squirrel hoarding nuts. It’s time to study those icicles that hang like crystal daggers and learn from their clingy nature. It’s more than a battle; it’s about outsmarting an element at its own frozen game. With these icy insights tucked into our strategy, we’re set to not just survive the cold weather challenges but to prevail with finesse.
DIY De-Icing Solutions: Safe and Effective Mixtures
In the arena of frost-bitten driveways and icy sidewalks, many a warrior has been bested. I, on the other hand, craft my battle strategy with shrewdness hewn from experience. Tapping into the generosity of Mother Nature, who blankets Moroccan deserts in warmth and carves the pristine ice caves of New Zealand, I’ve honed a roundup of homemade de icing solutions that are as safe as they are potent. Harness the power of these eco-friendly de-icers and take arms against the wintry onslaught without harming your domain or the Earth that cradles it.
The Natural Ice Melt Arsenal
Mixing up a gentle yet formidable blend of salt, water, and a splash of dish soap can undercut the sturdiest of ice barricades. This potion, dear friends, brings the muscle without the environmental scowl.
Ever the humble staple, baking soda emerges as a gritty champion in the struggle against slick surfaces. Scatter it with valor, and watch the ice retreat in kind.
The rinds of our citrus comrades come to our aid in this conflict. Lemon and orange peels, infused into a vinegar solution, create an aromatic elixir to banish ice while pleasing the senses.
Brace yourselves for it—sugar beet juice, the unsung hero of driveways everywhere. Its natural de-icing properties work ’til the ice capitulates, with soils and plants giving their nod of approval.
Safe De-Icing Mixtures Battle Table
Ingredient
Pros
Cons
Eco-Impact
Salt & Dish Soap
Highly effective, readily available
Use in moderation to avoid vegetation damage
Lower impact compared to commercial de-icers
Baking Soda
Gentle, non-abrasive, pet-friendly
May require reapplication
Minimal environmental disruption
Citrus-Infused Vinegar
Refreshingly scented, fans away ice
Preparation time needed
Safe for surroundings, biodegradable
Sugar Beet Juice
Exceptionally efficacious, non-corrosive
Availability may vary by region
Excellent, enriches soil
de icing
So, equipped with these natural ice melt recipes, I venture forth. A sprinkle of kitchen wizardry, a dash of garden lore, and voilà—the tendrils of frost beat a hasty retreat. Dream not just of safe passages, but of a conquest that leaves the land hale and hearty. For in this chilly foray, my friends, it’s not the strength of the ice that measures our mettle—it’s the wisdom of our methods in melting it away.
Geared for Battle: Choosing the Right De-Icing Equipment
Just as the right hiking gear is indispensable when facing the untamed beauty of a glacier, the proper de icing equipment is non-negotiable when confronting the frost fiends at my doorstep. Gleaming icicles and glassy surfaces may sing siren songs of winter enchantment, but I’m not so easily lured. With a seasoned eye, I size up my wintery adversary and reach for my cache of ice removal tools—my very own Excalibur—against the icy onslaught.
My hands are seasoned with the knowledge of many winters past. They know that each flake of snow and sheen of ice calls for tailored weapons from my arsenal. Choosing the right winter gear for de icing is not a frivolity; it’s strategy, it’s wisdom—it’s survival. I equip myself with an array of essentials, knowing that the difference between a wintry blight and a safe passage is forged in the quality of my de icing essentials.
The Armory: Essential Ice Removal Tools
A rugged, heavy-duty snow shovel is my stalwart companion, capable of clearing the bulk of my snowy woes.
The ice scraper stands ready, its sharp edge gleaming, poised to liberate my kingdom’s walkways from their glassy prison.
I adorn my driveway with salt spreaders, guardians that evenly cast de icing salt across the expanse, creating safe passage for all who tread.
For the stubborn ice that clings like a barnacle, an electric ice melt mat lies at the ready, warming my steps and my soul with its radiant embrace.
Now, prized readers, as you consider your own wintry confrontations, let me unveil a tableau—I present a guide to identifying which tool will be your ally in the times when the cold wind howls and the frost bites at your citadel.
De-Icing Tool
Best For
Notable Features
Handling and Care
Snow Shovel
Removing loose snow and chipping away thin ice
Ergonomic handle, durable blade
Store dry to prevent rust, sharpen blade as needed
Ice Scraper
Breaking up and scraping off dense ice layers
Sturdy handle, metal edge
Use with protective gloves; avoid scraping surfaces to prevent damage
Salt Spreader
Evenly distributing de-icing salt over large areas
Adjustable spread range, rust-proof components
Clean after use to prevent clogging, store in a cool, dry place
Electric Ice Melt Mat
Safeguarding entryways and high-foot traffic zones
Energy-efficient, weather-resistant materials
Roll up when not in use, keep clear from sharp objects
My intrepid friends, the compilation of ice conquest tools is no small feat. Each piece of equipment, from salt spreaders to electric ice melt mats, has been battle-tested and approved by frost-weary veterans like myself. As you endeavour to keep your own realms ice-free, may this treasury of knowledge guide you. Onward, armed with insight and the right de icing equipment, winter’s icy grip shall never hold sway over our dominion!
Tactical Application: Best Practices for Deicing Your Territory
As the chill sets in and Jack Frost begins to play his slippery games on my humble abode’s territory, I understand the critical importance of a strategic approach to deicing. Just as a seasoned explorer doesn’t gallivant into the wild without a map, strategic de icing requires planning and precision. Good soldiers of winter, let’s ready ourselves with the best practices for effective ice removal methods.
The application of de-icer is not to be a haphazard fling of salts in the general direction of your icy foe. No, it’s a calculated strike where timing, quantity, and technique must align as perfectly as the stars above the Moroccan desert or the ice alignments on a pristine New Zealand glacier. Ready to get granular with how to apply de-icer? Onward to the battlefield, we march.
Strategic Placement of Deicing Agents
Identify key battle zones: Scout high-traffic and sloped areas, where the ice may claim its unwitting victims.
Treat before the storm: Like laying the drawbridge before the siege, apply de-icer in anticipation of frost.
The pincer move: Apply de-icer evenly on both sides of an icy strip to encircle and conquer it efficiently.
Conservation Tactics for De-icer Application
Mind the munitions: Excessive de-icer not only wastes resources but may harm your green comrades-in-arms (your plants).
Enlist the eco-friendlies: Whenever possible, employ eco-friendlier salts to lessen the impact on our shared earth.
Manual efforts: Rally with your shovel or scraper before the de-icer; reduce the chemical need; and stay shipshape through the toil.
Monitoring the Weather Patterns
Be ever-vigilant, for weather is a mercurial ally. A dip in temperature or a sudden rally of snowflakes can turn the tides, necessitating a rapid response. Keep a weather eye on the horizon—success lies in recognizing and reacting to the signs of an imminent ice ambush.
De-Icing Technique
Method
Optimal Use Case
Resupply Frequency
Preemptive Strike
Application before ice forms
Driveways, sidewalks
Once, before a freeze
Salting
Even spreading of rock salt or sodium chloride
After ice has formed
As needed, sparingly
Brine Solution
Spray mixture of salt and water
Large, iced-over areas
During prolonged cold snaps
Targeted Treatment
Direct application to stubborn ice
Hard-packed snow, icy steps
Every few hours during day
With heart, wit, and steel (in the form of shovels and scrapers), we can boast that our homesteads will be safe harbors amidst the winter tempests. I speak from experience—frost has not yet penned a dirge that can dampen the spirits of those equipped with the best deicing techniques. In the fields of ice and freezing winds, we do not merely endure; we prevail with heads held high and walkways clear.
Protect and Maintain: Winterizing Your Property
As I gird myself for the annual frigid fray, I can’t help but share a truth universally acknowledged by those wise to winter‘s wiles: prep for winter is the stone upon which the sharp sword of home protection is honed. Much like prepping for an outing into nature’s ice-clad realms, where one gathers gear with care and foresight, winterizing your home demands a meticulous sweep of protective measures, all in service of fortifying one’s castle against the frostbitten siege.
In the quest for cold-weather property protection, I liken my abode to a steadfast galleon, its sails unfurled and braving the northern gales. I am the cautious captain at the helm, and lo, let me regale thee with the chronicles of safeguarding one’s dwelling from winter’s bone-chilling embrace. Prepare to navigate the stormy seas of property maintenance for winter, my intrepid homeowners!
Inspect Your Vessel: Much like checking one’s rigging before a monsoon, inspect all windows and doors for drafts. Caulking, my dear friends, is your loyal first mate in this endeavor.
Guard the Battlements: Your pipes, akin to a castle’s ramparts, must be insulated lest they succumb to the frost ogre’s clasp and burst with the spite of a scorned sorcerer.
Bolster the Gates: The furnace—your fortress’s hearth—requires a tribute of fresh filters and a ceremonial inspection before the onslaught of ice.
Entrench with Insulation: As warriors clad in mail, so too must your attic don a thick garment of insulation to fend off the invasion of Jack Frost’s legions.
Be not content with simply reading the lore of ensuring cold-weather property protection; nay, let your gaze fall upon this triumphant tableau I’ve assembled—a compendium of defense and diligence.
With a chalice of cocoa in hand and a well-curled scroll of preventative articulations, I secure my realm, from gutter to gable. I utter an incantation of insulation, a canticle of caulking. The gales may howl like the choirs of icy spectres, but my abode remains a bastion of warmth, a citadel impervious to their frosty fury. To my fellow champions of hearth and home: prep for winter thusly, and may your winters be but whispering sprites outside your sturdy doors.
Winter War Stories: Real-Life Tales of DIY Deicing Triumphs
Allow me to regale you with deicing success stories that twinkle like constellations in a winter sky. My chronicle begins with one particularly bracing morning when I awoke to a driveway more akin to an ice rink. Channeling the intrepid spirit of explorers who navigate the snowcaps of Arabia’s Atlas Mountains or those who voyage into the Martian-orange Outback, I set forth with grit in my eyes and determination in my heart.
My first venture into overcoming icy conditions was born out of necessity—an ice fortification barring my carriage’s egress. I had previously prepared a potion of my own devising, an eco-friendly de-icer echoing the milder temperaments of the land. A simple concoction, brine, brewed from hand-harvested salt and tap water with a secret whisper of dawn-picked sage—an aromatic nod to the herbs overlooking the sun-kissed cliffs of the Algarve.
The effect was as immediate as it was miraculous. Where previously there was an unyielding slick, there appeared a clear path, sympathetic to my soles, sparing the surrounding verdant life from an untimely saline demise. Oh, how I reveled in this DIY ice control anecdote—a testament to homegrown wisdom!
True stories of personal deicing experiences are best shared, much like tales huddled around a campfire. Here, for your enlightenment, is a tapestry of deicing success stories from a modest brigade of neighborhood de-icers:
Ice Warrior
Method of Battle
Landscape Fought
Tale of Triumph
Margaret, the Merciful
Rock Salt & Sand Mix
Sidewalks and Steps
Perseverance paid off despite initial slippery resistance; salt melted and sand provided the grip—pedestrians rejoiced!
Eco-warrior Emma
Beet Juice Splendor
Driveway
Rendered ice helpless with the sweet nectar of beets, a family legacy of red-stained success stories due to efficacy and no negative environmental impacts
Precision Paul
Calcium Magnesium Acetate
Entryways
With pet-friendly precision, I applied deicing spray a veteran’s touch against frost’s fortress—a triumph shared with four-legged companions.
Courageous Carlos
Alfalfa Meal Mélange
Driveway
Organic ardency, his driveway sprung from the clutches of Jack Frost with agrarian finesse, a lush victory.
Each of these vignettes is not merely a victory over the chills; they’re odes to ingenuity, resonating with the heady thrill of a hard-won battle. Tales spun not from the confines of heated chambers but wrought in the frosty maw of nature’s bitterly cold breath. My humble role in these stories? A mere chronicler, faithfully recounting personal deicing experiences that wield the power to embolden even the meekest among us.
As we go forth, let our cries echo in the still of winter nights: We are the guardians of our own paths, the masters of melting methodologies, and, by George, we can whip up a brine that would put the most seasoned ice fisherman to shame!
Wrapping Up Winter Wisdom: A Deicing Summary
As I stand at winter’s twilight, spearheading my final charge in the frosty fray, I wrap up this saga armed with an almanac of arctic know-how. We’ve journeyed together through the permafrost-laden narratives of do-it-yourself prowess, unraveling the strands of slippery serenity and standing sentinel over our snowy bastions. This is my gift to you—my concluding cold-weather tips—a collation of keen strategies, sage precautions, and war stories rung from the very ice we’ve battled.
Reflect upon the winter wisdom we have shared: choose your armor wisely, forge your strategy with foresight, and always mind the eco-wise whisperings of our shared battleground, Mother Earth. My chronicle has been written with precision to ensure that when the gales herald their chilly return, you stand ready, a masterful artisan in the alchemical arts of de-icing. The vaunted tale of the free bird granted passage over the de-fanged ice expanse will no longer be mere lore but your lived reality.
So, I bid adieu as the icicles retreat and the dawning warmth beseeches a triumph for every sovereign of suburbia. Let the de-icing summary linger in your mind—a testament to your prowess. These chronicles I’ve penned, bursting with homestyle cunning and the echoes of our shared victories, shall arm you with aplomb for winters yet to come. We have truly been the artificers of our fates, singing paeans to a winter well conquered. As the snow melts, my heart swells with pride, for we have joined valiantly and emerged not just unscathed but all the wiser.
As I gaze out over my frost-kissed lawn, my mind drifts to the seasonal adversary that every green-thumbed warrior must face: Old Man Winter. And in the realm of keeping our verdant domains flourishing, there’s a cold truth we must all embrace—preparing for winter is as crucial as the spring bloom. It’s time to don our garden armor and winterize sprinkler system, ensuring our precious lawn irrigation systems endure the icy grasp of the colder months. Whether it’s the in-ground sprinkler system winterization or the simple seasonal shutdown, I’m here to share wisdom on how to safeguard our silent, subterranean allies.
Let’s not forget, clever comrades of cultivation, that to prepare sprinkler system for winter is not merely a chore—it’s an art. It’s the difference between a springtime parade of greenery and the mourning of a frostbitten wasteland. Heed my call, and together we’ll dive into the epic saga of lawn irrigation system winterization. Because when it comes to defending our living landscapes, there’s no room for the cold-hearted.
Key Takeaways
Understand that winterizing your sprinkler system is a non-negotiable step to a thriving spring lawn.
Timing is key—winterize before the first freeze to prevent a garden tragedy of epic proportions.
Familiarize yourself with the cold-weather needs of your flora to provide tailored irrigation care.
Equip yourself with the right knowledge and tools to effectively prepare your sprinkler system for winter’s chill.
Regular checks and upkeep will ensure your sprinkler system and garden emerge from winter unscathed.
In-ground sprinkler system winterization is not just a to-do item—it’s a vital ritual for the seasoned gardener.
The Perils of Frost: Why Sprinkler Systems Need Winterizing
Sprinkler pipe that froze and burst
When the bite of winter chills the air and the camellias still dare to blossom, it’s a surefire signal for me to take up arms against the impending frost. It’s a time when the wise will protect their sprinkler system from frost, diligently working to prevent their system from freezing. As the beautiful “Winter Star” blooms persevere, so too must our defenses against the silent siege of cold on our lawn irrigation systems.
Putting our sprinkler systems in hibernation isn’t for the faint of heart—it’s an essential ritual for those who understand the fragility of underground waterworks. Failing to winterize your lawn irrigation system is tantamount to sending your troops into battle without armor. And trust me, this is one battle you can’t afford to lose.
Let me lay out for you, dear reader, the stark hazards that lay in wait for any system left to the mercy of frost:
Frozen Pipes: A frozen pipe is a cracked pipe waiting to happen. Much like the sturdy limbs of the “Shi Shi Gashira” camellias must withstand the cold, our pipes must be free of water to avoid a devastating split.
Damaged Sprinkler Heads: As “Pink Perfection” can sustain the cold with ample preparation, so must we shield our sprinkler heads from ice’s unyielding grip.
Compromised Backflow Preventers: Preventing contamination is much like preserving the pure beauty of the “Debutante” camellia—without safeguarding measures, the integrity is compromised.
To articulate these threats more vividly, I invite you to ponder the following table:
Winter Threat
Consequence
Prevention Tip
Frozen Pipes
May burst, causing costly damage
Use air compressor to blow out water
Damaged Sprinkler Heads
Replacement expenses and uneven watering
Inspect and cover heads before first freezing.
Compromised Backflow Preventers
Risk of tainted water supply
Insulate to ward off the frost’s touch
Never doubt, my fellow horticulturalist comrades, the wrath of winter’s freeze. Speak to any seasoned gardener and they’ll sing you the tales of irrigation systems lost to complacency. Hear my words—an ounce of prevention in the fall is worth a garden free of turmoil come spring. So, let’s gird our loins, winterize our lawn irrigation systems, and send our sprinkler systems into hibernation, poised to thrive in the next season’s warmth.
Understanding Sprinkler System Winterization: What It Entails
Sometimes I ponder whether my readers are truly aware of what is sprinkler system winterization? It’s the gardener’s version of battening down the hatches, where we ready our irrigation systems for a long winter’s slumber. It’s not just about avoiding ice; it’s about ensuring our drip irrigation systems greet the spring thaw in prime condition. Let’s unveil the enigma of winterization together.
Why is it important to winterize your sprinkler system, you ask? Imagine the horror as you witness your green paradise turn into a frozen battlefield come spring, all because the frost attacked the very lifeblood of your irrigation system. Winterizing is like outfitting your sprinklers in a warm, protective coat, insulating them against the cold snap’s cruel bite. It’s our bulwark against the frost, preventing cracks, burst pipes, and the nightmarish waterworks repairs that might follow.
Now, garden enthusiasts often whisper about the mysterious costs entwined with these seasonal rites. How much does it cost to winterize a sprinkler system? The answer depends on myriad factors: size of your system, complexity, and whether you’re summoning a professional or embarking on a brave DIY journey. The price ranges widely, but neglecting this ritual can lead to repairs eclipsing the humble expenses of winterization.
And let’s not overlook the delicate song of the drip irrigation system winterization. This melody is different, requiring a gentle touch, as these systems tend to cater to our most prized plantings with precision. Winterizing these systems ensures that the droplets that quench our garden’s thirst aren’t locked in a frozen embrace.
If you’re pondering the intricacies of winterization, allow me to present a table that simplifies this essential autumn task:
Those of us who’ve weathered the frost know that safeguarding our sprinklers is akin to protecting our verdant kingdoms from a siege. It requires foresight, preparation, and the willingness to invest time or resources for the greater good of our gardens. Let there be no doubt, detectives of drip and mavens of mist—winterization is your secret weapon in the crusade against the cold.
Choosing the Right Tools: Sprinkler System Winterization Kit
Armed with the task of conquering the frosty frontier, I find myself championing the critical crusade of selecting the perfect arsenal for the impending winterization of my sprinkler system. It’s akin to drafting warriors for battle—a judicious choice goes a long way. With a myriad of sprinkler system winterization kit options vying for my validation, how does one choose the knight in shining armor for their irrigation system’s winter defense?
For those of you trekking down the self-sufficient path of sprinkler system maintenance, let me illuminate the essentials for your inventory: sprinkler system winterization kits and irrigation system winterization kits. These kits, oh wise garden guardians, are your allies in ensuring that every droplet of H2O has vacated the premises, leaving no prisoners to the merciless cold.
Let’s dissect the anatomy of a top-notch winterization kit. Think of it as drafting your dream team—all-star players, each with a special role in fortifying your sprinkler system’s armor against the icy onslaught.
Sprinkler System Blowout Adapter: Like a wizard’s staff channeling powerful spells, this adapter connects the might of your air compressor to your sprinkler system, banishing every last water droplet.
Flexible Hose: A conduit to bridge your air compressor’s brawn with your sprinkler system’s complexity—it’s the trusted steed upon which your air blasts ride.
Pressure Gauge: A vigilant sentinel, this gauge watches over the pressure of your air blows, ensuring you don’t awaken the dragon—excessive force that could wreak havoc on delicate pipes.
Thread Seal Tape: An enchantment in tape form, ensuring that when you join two worlds—the air compressor and your sprinkler system—not a single elemental can escape the thread’s embrace.
And let’s not neglect the dragon in the dungeon, the beast that must be tamed—an air compressor for sprinkler system winterization. Choosing the right steed in the form of an air compressor is paramount. Too feeble, and it won’t clear your kingdom’s watering veins; too robust, and you might just blow the kingdom to bits.
Engaging in honorable sprinkler system maintenance, you’ll also need to consider your garden’s realm—size, topology, and the complexity of your irrigation network. Embark on your quest bearing these variables in mind.
Tool
Function
Why It’s Essential
Air Compressor
To expel water from pipes
The centurion leading the charge against freezing
Blowout Adapter
Connects compressor to irrigation system
The loyal intermediary translating raw power into a focused stream
Hose
Directs the airflow
Maneuvers the cleansing breath of the air compressor through your waterways
Pressure Gauge
Measures PSI levels
Keeps your campaign within the bounds of safety
To my fellow green-thumbed compatriots, let this be a beacon of guidance as you gird your loins for the chill that beckons. With your well-curated sprinkler system winterization kit in tow and the robust lungs of an air compressor, your irrigation system’s winter’s nap shall be both restful and rejuvenating. Go forth, brave gardener, and may your steed be steady and your sword sharp!
The Blowout Method: Using an Air Compressor to Protect Your System
As the leaves turn and the air brings a crisp chill to the morning, my thoughts turn to the critical task at hand: the blowout method. With an air compressor primed at my side, I’m ready to face the quest of evicting every last droplet from my sprinkler system. With my trusty blow-out adapter for sprinkler systems in hand, I’m the maestro of moisture control, leading the charge against winter’s freeze.
To the uninitiated, this method might sound like a Sunday afternoon pastime, but let me assure you, it’s the stuff of legends. The air compressor for sprinkler system winterization is the unsung hero that, when wielded properly, can save your green asset from the icy clutches of winter.
So, let’s roll up our sleeves and get to work. Here’s how to get all the water out of my sprinkler system, ensuring that Jack Frost finds no lodging within its pipes.
Step 1: Ensure your air compressor is properly fitted with a sprinkler system blowout adapter. This magical junction is where power meets precision.
Step 2: Shut off the water supply to prevent new water from entering the fray, for water is the ally of frost and we want none of that.
Step 3: Connect the adapter to the system’s mainline and let the compressor do its dance. The symphony of air flowing through your sprinkler system is music to a winterizer’s ears.
Step 4: Open each zone successively and thrust the compressor’s powerful breath through the lines. Listen for the hissing song—a ballad of departure for water droplets.
Step 5: Hold the fort until no water spews forth from the sprinkler heads. Victory is a dry, silent sprinkler.
Still wondering about the specifics of the blowout adapter crucial to this process? Behold, a table of details to guide you through the selection:
Adapter Feature
Importance
My Recommendations
Material Quality
Ensures durability against the pressurized force
Opt for brass adapters for their resilience
Compatibility with Air Compressor
Prevents leaks and ensures proper airflow
Check the compressor’s output fitting and match it with the adapter
Easy Installation
Saves time and mitigates frustration
Choose adapters with hand-tightening features
Pressure Rating
Withstands the PSI needed to clear the system
Look for a rating that exceeds your compressor’s output
With the wisdom of how to effectively wield an air compressor and the right sprinkler system blowout adapter, you’re now equipped to take on the coldest of winter’s threats to your irrigation system. So, gather your gear and charge forth into battle. When spring arrives, your lawn will stand as a testament to your foresight and toil, a verdant victory over the frost!
Anti-Freeze Measures: Safeguarding with Non-Toxic Solutions
When winter’s chill marches across the landscape, the diligent gardener turns a wary eye to the silent, lurking menace: the freezing of their beloved sprinkler system. Ah, how quickly a burst pipe can turn a winter wonderland into a disastrous swamp! Fear not, for this is where I, your humble horticultural scribe, wade in with spirited advice on using anti-freeze for sprinkler systems and keeping the icy specter at bay.
Now, let’s spin the yarn of how to arm your precious irrigation infrastructure against Jack Frost’s insidious creep. Our tale begins with the hero of our narrative: non-toxic antifreeze for irrigation systems. Unlike its automotive cousin, this gallant protector offers a safeguard that’s friendly to the flora, fauna, and the very earth that cradles your greensward.
Plant savants and turf defenders might inquire, “But how do we weave this magic?” The sorcery lies in the elixir’s proper application, ensuring each drop wards off the freeze without harming the environment. Here, then, is the incantation to cast:
Choose a trusted brand of non-toxic antifreeze—one designed specifically for irrigation systems.
Pour the antifreeze into the mainline after the water has been drained. This is akin to blessing the system’s veins with a potion of resilience.
With your system insulated by the antifreeze, you can rest easy, knowing the freeze will not stake a claim to your pipes.
And what of the backflow preventers? Oh, readers of green repute, the backflow preventer is the chivalrous knight standing sentinel against the tide of contaminants. It, too, must be winterized, lest it succumb to the encroaching freeze. Here’s how to clad it in winter armor:
Shut down the water supply—akin to lowering the portcullis before a siege.
Drain all the water, like evacuating the townsfolk before a snowstorm.
Add a dollop of non-toxic antifreeze as a mystical warding glyph to keep the backflow preventer from freezing solid.
Tread softly, gentle cultivator, for each system is a unique beast. One must consult the grimoire of their irrigation system’s manual to honor its individual rites and requirements. But, for the visual adepts among us, let me conjure a table that sheds light on these practices:
Component
Winterization Method
Non-Toxic Antifreeze Application
Sprinkler System Pipes
Utilize the blowout method
Poured into the mainline post-draining
Backflow Preventer
Shut off, drain, insulate
Add after draining, before the final seal
Valves and Sprinkler Heads
Insulate above-ground parts
Not usually necessary if water is removed
Frozen pipes
Be sure, as you cast your anti-freeze enchantments, to choose a potion that’s propitious to all the living denizens. After all, what is a garden but a sanctuary for the verdant and vibrant kin of the soil? Aye, as you ponder how to protect your lawn sprinkler system from freezing, give a nod to the gentle nontoxic answers that ensure your greensward awakens from winter’s slumber, unharmed and eager for the spring.
Regular Check-Ups: The Sprinkler System Maintenance Checklist
When the camellias of the Lowcountry beckon with their winter bloom, I’m reminded that diligent care is the secret to their—and any plant’s—vigor. It takes more than a green thumb to ensure their survival; it requires vigilant scheduling with a sprinkler system maintenance checklist. Maintenance is the mantra of the soil sage, and it carries through every season, keeping the well-drained soil perfectly poised for ample moisture absorption.
I’ve become the keeper of the checklist, perennially pursuing the perfection of my lawn irrigation system upkeep. Hence, I affirm, you can’t simply learn how to winterize my lawn irrigation system; you must embrace the spirit of seasonal stewardship.
For your perusal and progressing from this green griot of gardening, below is the sacrosanct sprinkler system periodic maintenance tableau:
Winter Maintenance Task
Action Steps
Frequency
Inspection of Sprinkler Heads
Check for wear, clogging, or damage; clean or replace as needed
Monthly
Review of Irrigation Scheduler
Adjust watering times for changes in weather and plant needs
Bi-monthly
Winterization Process
Prepare the system for freezing temperatures; includes blowout method and insulation
Annually, before the first freeze
Valve Inspection
Ensure valves close properly; look for leaks or signs of corrosion
Quarterly
Pipeline Health Audit
Check for leaks, fractures, and proper water pressure
Bi-annually
Backflow Prevention Assurance
Test backflow device to prevent contamination of potable water
Annually
Controller Check
Verify correct programming and functioning of the irrigation controller
Monthly
Soil Moisture Monitoring
Use a soil probe to verify adequate soil moisture levels, especially around plants like camellias
Weekly
Let’s dissect the checklist a tad further. You see, the camellias in my realm fancy themselves as parched aristocrats; they demand a touch noble in hydration. The lawn irrigation system upkeep isn’t merely about water flow; it’s an alchemy of nourishment. Consider the precise needs of each vegetal subject, like the camellias with their penchant for moisture without the marshy mire.
Lo! Should my words fail to inspire your winter work on the lawn, glance yon at the unordered litany of tasks, for the ink of knowledge flows freely from my pen:
Visual inspection of every sprinkler head to avoid the embarrassment of an unexpected shower or, worse, a drought in a corner of your realm.
Akin to adjusting a timepiece, calibrating the irrigation controller to compensate for the shortened reign of the sun.
Heeding the call of frost, suiting up your system for its seasonal slumber with the solemn rite of winterization, that it may awake refreshed come the thaw.
Offering tribute to the guardians of purity by scrutinizing the backflow preventer for it must never falter.
Consulting the moisture oracle (aka soil probe), ensuring the soil is not parched nor overindulged, especially around the roots of royalty—our dear camellias.
Take my checklist as gospel, field marshal of foliage, and you shall never be caught unawares by winter’s surprise offensive. No camellia shall wilt, no blade of grass shall crumble. Onward, to the seasonal care that heralds verdant victory!
Conclusion
As the final leaves descend and we tuck our gardens into their winter beds, let us not forget the silent sentinels of our lawn: the trusty sprinklers. In my autumnal reflection, it’s clear that understanding how to properly shut down your irrigation system for winter is not just sage advice—it’s essential to the coming spring’s jubilant burst of life. So, whether you’re a DIY maestro ready to winterize your sprinkler system with your own hands, or you’re browsing the web on how to hire a professional sprinkler winterization service, remember that this rite is the prelude to your garden’s next symphony.
The winterizing sprinkler system cost is a drop in the bucket compared to the peace of mind it brings. Think of it as an investment in your land’s future, much like a knight’s armor is to his legacy. Whether you seek the winterize sprinkler system DIY tips that I dispense with a flourish or you opt for the sturdy hand of a seasoned professional, the aim remains the same: protect your domain from the looming frost. And hey, pairing cost-effectiveness with self-sufficiency is a duo that would make any gardener’s heart swell with pride.
So, as we draw the curtain on this tale of preparing and protecting, bear in mind the lessons etched in the cold air and whispered by the hardy camellias: vigilance and preparation are the keys to flourishing. Do not skip the sacred act of winterization, for it’s the kindest goodbye you can offer your green companions before the snow’s embrace. Fellow gardeners, may your lawns slumber sweetly, ready to awaken in spring’s tender warmth.
As winter wraps its frosty fingers around our neighborhoods, I find myself eying the sidewalk with a mix of determination and defiance. Snow removal isn’t just a chore; oh no, it’s a battle against the fluffy nemesis that dares to blanket our footpaths. Armed with my trusty shovel and a battle plan for de-Icing, the clear path to victory over the treacherous terrain is not just a dream. It’s my mission to ensure we all have safe passage along a snow-free walkway, facing down blizzards with grit, salt, and a smirk. I’m more than ready to share my wintery wisdom to help you ace winter maintenance and champion your own frosty frontier.
Deploy de-icing agents as a preemptive strike to keep footpaths navigable.
Embrace the tortoise’s mantra: slow and steady wins the race against accumulation.
Prepare your seasonal arsenal with ergonomic shovels and eco-friendly melting agents.
Train in the art of the shovel lift to keep your back as strong and intact as your snow-free walkway.
Remember, each flake conquered is a step towards a safe, winter maintenance-masteredpavement.
Icy Intel
Smart Snow Blowing
Turn snow-blowing into an art form. Blow the snow in a direction that doesn’t block your path or your neighbor’s. Think of it as strategic snow sculpting.
Use a Wet/Dry Vacuum to Remove Snow
Got a wet/dry vac? Use it to suck up light snow. It’s like vacuuming your carpet, but colder and less satisfying.
Use a Shovel Attachment
Upgrade your shovel with an attachment for better leverage. It’s like giving your shovel a power-up in a video game, but the points you score are just a less sore back.
Read to the end for an EXTRA BONUS ICY INTEL!!
The Ultimate Snow Battle: Preparing Your Sidewalk Arsenal
Let’s cut to the chase; winter is coming, and my sidewalk isn’t going to shovel itself. I’ve learned that the key to successful snow removal begins with preparation. With the right tools and tactics, I can keep my walkway clear and my sanity intact. Whether you’re a seasoned snow warrior or a newbie facing the seasonal showdown, my guide to gearing up will serve you well.
First off, you’re going to want to reassess your entire snow battle strategy. It’s not just about moving mounds of nature’s confetti; it’s a calculated campaign to maintain your domain and your dignity. Hence, the reconnaissance: survey your sidewalk and pavement, pinpoint the usual trouble spots, and plan your path of attack accordingly to effectively winterize your property.
Now, let’s talk arsenal. You can’t go into this frosty fray with a flimsy piece of plastic and a prayer. No, you need the heavy artillery.
An ergonomic snow shovel is your best friend; it’s all about minimizing back strain and maximizing snow displacement.
Products that melt ice without assaulting the earth are a savvy snow remover’s choice. So, let’s stick to environmentally friendly de-icing products, shall we?
Remember, we’re going artisanal with our approaches—think hand-crafted DIY snow removal methods. They’re not just effective; they’re also satisfying, like a home-baked cookie, but icier and less delicious.
I’ve also drawn up a strategic table outlining the gear you need to face winter head-on. Review it, commit it to memory, and hit that hardware store like the warrior you are.
Equipment
Description
Purpose
Ergonomic Snow Shovel
Shovel with angled handle
To reduce back strain during long bouts of snow clearing
Eco-Friendly Salt Alternative
Natural de-icing compound
To melt snow and ice without damaging the environment or pavement
Walkway Heater Mats
Electrically heated mats
For an always-clear path and as a supplement to shoveling
Snow Roof Rake
Telescoping rake for snow
To remove snow from rooftops and prevent dangerous snow buildup
Oh, and one last bit of chivalry for the shoveling knight: learn and live by proper shoveling technique. Plant your feet, bend your knees, keep your back straight, and hoist that snow with the pride of a penguin sliding on ice. It’s not just about keeping your sidewalk pristine; it’s about emerging from the blizzard back intact and triumphant.
So, strap on those snow boots and let’s get to it. Winter may be throwing down the gauntlet, but we’ve got this. Ready your shovels, my fellow snow gladiators, and may your walkways remain as clear as your resolve.
Efficient Snow Removal: Techniques and Tips
Ever heard the shoveling enthusiast’s battle cry, “Snow or shine, we clear the line?” Well, that’s my mantra as I brace against the chill to ensure a snow-free walkway. Let me tell you, maintaining an accessible pedestrian path doesn’t happen by accident. It takes a combination of strategic timing, robust equipment, and good old-fashioned gumption.
Timing is everything. You want to keep an eye on the skies and plan your snow removal efforts around Mother Nature’s schedule. Emptying the driveway just before bedtime only to wake up to a fresh blanket of snow is enough to chill anyone’s spirits. So, take my advice and time your strikes, shoveling multiple times during a storm to prevent snow accumulation.
But it’s not just about when you shovel. How you shovel counts too. Layer up in your warmest winter gear and adopt a staggered hand grip on that snow shovel. This technique is a godsend; it provides the leverage you need and goes easy on your back. Trust me, your spine will thank you.
Now, let’s not forge a bond of hatred with Mother Earth while we fight off her snowy onslaughts. Instead of reaching for those chemical-laden de-icers, consider using an eco-friendly snow pusher. These bad boys make light work of snow piles without leaving a harmful residue.
For those of us who end up feeling like we’ve deadlifted a small car after a bout of shoveling, I’ve put together a little cheat sheet. This quick-reference table lines up some epic snow shoveling slogans to boost morale and some smart equipment choices to keep your snow battle efficient and fruitful. Let’s unveil the heroes of a snow-clear sidewalk.
Equipment Type
Suggested Brand
Benefits
#SnowShovelingSlogan
Ergonomic Snow Shovel
BackSaver
Reduces back strain and improves lifting efficiency
“Back in action; no snow distraction!”
Eco-Friendly De-Icer
EarthSafe
It melts ice without damaging concrete or greenery
“Keep it clean and green; sidewalks are serene!”
Weather-Resistant Outerwear
ChillShield
It keeps you toasty as you conquer frosty walkways
“Bundled up for the battle, snow doesn’t rattle!”
Snow Pusher
GlacierGlide
Clears large areas quickly without lifting
“Slide and glide; snow can’t hide!”
Remember, friends, efficient snow removal isn’t just about keeping your toes warm and your muscles spry. It’s about creating a snow-free walkway for the greater good. So, may your shovels be sharp, your walkways clear, and your pedestrian path be the envy of the entire block.
The Secret Hack: Cooking Spray’s Surprising Snow Shield Powers
Cooking spray : a genius snow-clearing hack
Who would have thought that my culinary companion could become my wintry warrior? That’s right, I’m talking about the unassuming can of cooking spray. When the sky unleashes its snowy siege upon my concrete pathway, this kitchen staple is my secret weapon. Allow me to let you in on one of the most ingenious DIY hacks I’ve discovered for battling the blizzard blues.
A mere misting of cooking spray on the business end of my shovel transforms it into a veritable snow shield. No longer shall clumps of snow cling to my shovel with icy tenacity. A light coat, and I’m flipping snow with the fines of a line cook tossing a pancake. The slick surface ensures each scoop of snow slides off effortlessly, maintaining a snow-free sidewalk with every pass.
Here’s the scoop (pun intended): it’s cost-effective and won’t wreck your budget. Plus, with the ease and efficiency of shoveling, you’ll spend less time in the cold and more time enjoying a toasty mug of cocoa by the fireplace.
Feast your eyes on the table below. It’s a step-by-step guide on how to turn your average shovel into a no-stick snow launcher. Who knew tackling Old Man Winter could be as easy as greasing a pan?
Step
Action
Result
1
Lightly coat your shovel blade with cooking spray
A non-stick surface that repels snow
2
Remove snow from your sidewalk and driveway as usual
Efficient shoveling without the snow sticking
3
Reapply as needed during your snow removal process
Consistently easy shoveling throughout the storm
4
Wipe down your shovel after snow removal
A clean shovel ready for the next snowy onslaught
The best part? This hack doesn’t just make the job easier on your arms; it also spares your concrete pathway from the damaging effects of traditional de-icing chemicals. So, not only are you working smarter, not harder, but you’re also doing your part to protect your beloved walkway and the environment.
Winter, with its frosty ambush, always seems to have a trick up its sleeve. Well, two can play at that game! With my can of cooking spray and a shrewd shoveling strategy, I hereby declare that the snow doesn’t stand a chance. So, my frost-battling friends, let’s banish that blanket of white and keep those sidewalks pristine. Here’s to a swift, safe, and snow-free sidewalk this winter season.
Winter Maintenance: Protecting Pavement and Preventing Ice
When Old Man Winter comes knockin’ and the flakes start to flock on my sidewalk, I get down to business with Winter Maintenance to keep that pavement clear. It’s not just a fancy dance with a shovel, though—protecting pavement is a serious matter. I’m all about deploying that proactive prowess to stop the ice before it bonds like love-struck penguins to the concrete. It’s all about pre-storm prep and a savvy snow removal strategy when the white stuff descends.
My secret sauce? It’s all in the timing and tools. Apply those eco-friendly de-icers with a gentle touch, so Mother Nature doesn’t throw a fit. I prefer sending in my salt alternatives before the snowstorm hits, like a stealthy ninja protecting my precious pavement. This way, we’re preventing the ice from getting too cozy and causing a slippery scene.
After the snow bash, I turn down the dial on those harsh salt-based de-icers. With an eagle-eyed approach to de-icing, I ensure my concrete stays as solid as my snow disposal reputation. After all, while the snowy spectacle is busy painting the town white, I’m keeping things safe and solid underfoot.
Don’t think for a moment that I shy away from a good manual labor session either. Once those flurries fly, I’m out there at regular intervals, keeping up with my winter maintenance mantra: a clear sidewalk is a safe sidewalk. Now, feast your eyes on this table; it’s a rundown of my proactive pavement protection plan—a literal blueprint to protecting pavement.
Action
Reason
Benefit
Pre-apply Eco-Friendly De-Icers
Prevents ice from adhering to the pavement surface
A safer, less slippery stroll down the sidewalk
Regular Shoveling During Snowfall
Minimizes ice buildup and promotes easier removal
Less time de-icing and more time reveling in a winter wonderland
Post-Snowfall Salt Reduction
Minimizes environmental impact and pavement corrosion
Long-term sidewalk integrity and earth-friendly vibes
With this tactical trove, no flurry or icy incursion will stand against my sidewalk-guarding valor. Ensuring the longevity of your sidewalk’s service is my wintry war cry. Join me, fellow frost fighters, on the front lines of Winter maintenance. Together, with tools in hand and strategic minds, we’ll keep our pavement primed against the perilous ice with a snow removal strategy that’s both effective and kind to our dear planet. Now, let’s shovel on.
Snow blower gone wild
Clearing a Path: Mechanical Tools and Snowblower Smarts
Those serene white winters can quickly turn into a grunt-filled Groundhog Day of shoveling. That’s why I’m a staunch advocate for throwing a bit of horsepower into the mix. I’ve witnessed firsthand that mechanical tools are less backbreaking and far more efficient at maintaining a snow-free walkway. So, if your muscles are muttering about mutiny after too much shovel time, it might be time for you to consider the wonder that is the snowblower.
Now, let’s talk about snowblower smarts. If you’re serious about your DIY snow removal techniques, mastering the mechanical minutiae of your snowblower isn’t just smart; it’s downright genius. Knowing the right levers to pull and when to pull them can make the difference between a clear footpath and a snowbound sidewalk.
Make sure you familiarize yourself with the starting procedures. Each model has its quirks, and there’s nothing more frustrating than a snowblower that won’t roar to life.
Schedule regular maintenance. It’s like flossing—nobody loves it, but it prevents all manner of unpleasantness down the road.
Plan your snow discharge direction. You don’t want to be “that neighbor” who just relocates the problem onto someone else’s property.
But let’s not forget the safety dance: ensuring that the footpath is clear of hidden debris can save your machine from damage and keep everything above it safe. Always, and I do mean always, keep kids, pets, and the curious gawker well clear when you’re operating this beast.
If you’re new to this whole whirl-a-gig of winter wizardry, here’s a starter table to help you choose your snowy sidekick:
Snowblower Type
Best For
Power Source
Feature
Single-Stage Electric
Light Snowfall & Short Walkways
Electric Cord
Ease of Storage
Single-Stage Gas
Medium Snowfall & Mid-Size Driveways
Gasoline
Faster Clearing
Two-Stage Gas
Heavy Snowfall & Large Areas
Gasoline
Power Steering & Large Intake
Battery-Powered
Environmentally Considerate Users
Rechargeable Battery
No Fumes & Lower Noise
Resist the urge to weep into your woolens when the snow piles high; your trusty mechanical marvel is there to make the battle less barbaric. And remember, when wielding your mighty snow-eating monster, operate with care and your Snow-Free Walkway shall emerge victorious. Now, go forth and show that snow who’s boss!
Conclusion: The Wintry Wrap-Up to Sidewalk Sovereignty
Silly or genius?
And there you have it, my chilly compatriots: the snow-swept journey to snow-free walkways and sidewalk maintenance mastery has reached its end. If there’s one frosty nugget of wisdom to take from this, it’s that preparation meets opportunity—and in the case of tackling snow, that opportunity is every time a flake dares to touch down on our sovereign soil. From selecting the right shovel to embracing the power of cooking spray, we’ve covered strategies that will make you the monarch of your clear sidewalk strategies.
Combining our eco-friendly de-icing prowess and mechanical might with my own arsenal of tips ensures a win against winter’s wiles. Yes, unleashing the full force of your snow warrior spirit with meticulous snow removal strategies is indeed the path to a safe, serene winter season. Remember, when the ice strikes, we strike back with grace and, let’s admit it, a bit of swagger.
Consider this your guide, your blueprint, and your snow-commandments, if you will, for not just surviving but thriving amidst the cold. We take on winter safety not as a burden but as a challenge—a seasonal game where we play for keeps. Now take forth this knowledge; let it be a fiery beacon in the blizzard, guiding you to victory over vicious vanquishable vapors (otherwise known as snow). Because when it comes to a clear sidewalk, by golly, we’ve got the matter licked like an icicle on a sunny day.
Extra-Icy Intel
Make Your Own Ice Melt: Why buy ice melt when you can DIY?
a. Use table or rock salt
Oldie but a goodie. Sprinkle it on ice and watch it do its magic. Just like seasoning food, but less delicious.
b. Use salty liquid solution, such as pickle juice spray
Pickle juice isn’t just for sandwiches anymore. Spray it on ice. Bonus: Your sidewalk might smell like a deli.
c. Use rubbing alcohol and water (50/50) or high-proof vodka or gin
Mix rubbing alcohol with water or repurpose that vodka for the greater good. Your sidewalk gets de-iced, and you get bragging rights for creative recycling.
As winter unleashes its frosty wrath, the snowfall challenges land with a particularly heavy thud on my parking area. Every flake seems to conspire against vehicle parking, tempting me to raise the white flag. But not this year. I’ve crafted a DIY snow removal guide that’s more than just a strategy; it’s a declaration of independence from snow-induced captivity. So, fellow rebels, let’s conquer parking areas together with shovels high and snow blowers roaring. It’s time to show these drifts who’s boss!
Strategies and equipment go hand-in-hand in conquering the relentless snowfall challenges.
Vehicle parking doesn’t have to be a battleground; turn it into a victory against the elements with the right approach.
A proactive stance on snow removal can lead to a season free from the stress of unexpected accumulation.
Equip yourself with the knowledge and tools to succeed, making every snowfall an opportunity to demonstrate your mastery over the winter landscape.
Blizzard Busters
Use Cooking Spray
Tired of snow sticking to your shovel like last night’s lasagna on a baking dish? Spray a bit of cooking spray on the shovel. It makes the snow slide off like butter, and hey, it smells nice too!
Set a Schedule for Snow Removal
Make snow removal less daunting by setting a schedule, like a TV show you can’t stand to miss. Every few hours, or after a certain amount of snowfall, get out there and show that snow who’s boss. I motivate myself by calculating the calories I’m going to burn. I get it done super quick with high-intensity interval training, which puts a multiple on the calorie burn, so I can drink more peanut butter whiskey. The last blizzard was a bit of a blur after 10″.
Spread Sand Over Slippery Areas
Turn your driveway into a beach getaway, minus the sun, sea, and sandcastles. Spread sand over icy patches to avoid doing the Bambi-on-ice routine every morning.
Make Shoveling More Comfortable
Remember, it’s a snow shovel, not a medieval torture device. Wrap the handle in foam pipe insulation or tape to avoid blisters and keep your hands from freezing off.
Read to the end for BONUS Blizzard Busters!!!
Snow removal battlefield
Understanding Your Parking Area Terrain: Know Your Snow Battlefield
When the first snowflakes twirl down from the winter sky, I can’t help but think of it as a picturesque prelude to the inevitable snow battle that awaits. If you’re responsible for a parking space, you know the drill. The serene snowscape soon transforms into the winter parking challenges, where every inch of your domain becomes contested terrain. Let’s get strategic and learn to evaluate our parking area’s terrain to outmaneuver the snowy onslaught.
Firstly, let’s play general and survey our battlefield. The slope of our terrain, for example, can be a treacherous ally or foe. A steep incline may hasten drainage, yes, but it can also invite icy conditions faster than you can say “black ice.” As for the impatient snow melt that trickles down, it seeks out any depression in the parking area to form an icy trap for the unwary pedestrian or tire.
Now, while I cannot offer you a one-size-fits-all plan, I can share some wit-tempered wisdom to turn your parking area’s unique characteristics into advantages. Let’s dissect this further with our table of tactical terrains.
Terrain Feature
Description
Impact on Snow Removal
Strategic Snow Removal Tips
Flat Surface
Evens out, lacking significant slope.
May accumulate snow easily, causing problematic water pooling.
Regular removal and proper grading for water runoff.
Gentle Slope
Mild incline, subtle gradient.
Offers natural drainage but may lead to uneven snow distribution.
Focus on areas where snow accumulates; use gravity to your advantage.
Varied Terrain
Mix of slopes, angles, and flat areas.
Challenging snow removal has the potential for ice formation.
Tackle high points first and ensure efficient drainage paths.
Sunken Areas
Depressions and dips in the landscape.
Prone to ice accumulation, it is dangerous for vehicles and pedestrians.
Monitor closely after snowfall and rain; apply ice-melt products preemptively.
As every chess master knows, it’s all about positioning, just as it is in the art of snow removal. Take your parking location’s terrain knowledge and align it with the right strategies. For instance, where you push that white flurry off to is as crucial as the act of clearing itself. Strategic piling—away from the center, please—makes for easier post-snow operations and happier parking patrons.
Investigate the terrain. Parking space isn’t created equal; know your area’s topography.
Anticipate trouble spots: Ice likes to skulk where water pools, so foresight is key.
Keep the drainage lines clear. Clear paths for melting snow help prevent ice wars.
Action snow clearing based on the terrain complexities: move fast on slopes, be careful on flats.
Whether you’re managing a vast car park or a humble home driveway, understanding the location’s terrain before the winter parking challenges begin gives you a tactical edge. Get to know the snowy field of play, and you’ll be armed not just with a shovel but with precious know-how. And with the right maneuvers this winter, your parking space will emerge victorious over the sea of white.
Arm Yourself: The Must-Have DIY Snow Removal Tools
When Jack Frost gets a little too zealous, laying a frosty siege on our driveways and parking lots, it’s time to marshal our DIY snow removal tools. Fear not, for the might of a well-equipped winter warrior can turn the tides in the chilly theatrics of residential parking lot upkeep. Allow me to unveil the arsenal that’ll keep your asphalt domain free of the white onslaught and ready for vehicle traffic.
A veritable armamentarium of gear is at your disposal, each weapon of snow banishment crafted for a different facet of the vehicle parking maintenance odyssey. Let’s dive headfirst into this snow-clearing cache, for knowledge is power—and power leads to clear pavement.
Tool Type
Use Case
Why It’s Essential
Shovels
Clearing walkways, steps, and small drifts
Agile and effective for quick, manual snow clearance
Snow Blowers
Clearing large driveways and parking areas
Efficient removal of heavy snowfall without back-breaking effort
Ice Melt
Preventing slip-and-fall accidents
Creates a safer surface by swiftly melting dangerous ice layers
Roof Rakes
Removing snow from roofs and overhangs
Prevents structural damage and ice damming
Ergonomic Tools
Reducing strain during snow removal
Minimizes the risk of injury, making snow clearing a more sustainable task
Tarp or Snow Melt Mat
Cover driveway prior to snowfall then simply pull off and dispose of snow after the last snowflake
Make your neighbors jealous with this easy peasy snow-free driveway solution.
These aren’t just tools; they’re lifelines to normalcy amidst the festive mayhem of a winter wonderland. Equip yourself wisely, and the icy grip of Mother Nature will never hold you hostage in your own home.
As your fearless guide through the tundra that was once your parking lot, I’ll arm you with knowledge as much as tools. The best DIY snow removal tools are not wands or scepters of old; they’re extensions of your will to reclaim and maintain your domain from the snowy chaos. Begin your winter with the right snow equipment, and the term ‘snowed in’ will be but a legend to scare the kids with. Keep your parking area upkeep game strong, and remember—a rebel never surrenders to a few rogue snowflakes.
Strategies for Snow Pile Management: Where to Put it All?
When the frigid pageantry of winter unleashes a flurry of challenges, one’s mettle is truly tested in the realms of snow pile management. You’ve shoveled, you’ve plowed, and now you stand, a conqueror amidst a landscape of white. But victory’s sweet savor wanes as a new foe emerges: Mount Snowmore—a byproduct of your exertions. Fret not, for I shall impart the sage strategies of where to cast these frosty ramparts, ensuring your domain remains a bastion of passage, void of wintry obstruction.
My open-field offense begins with this: locating the ideal snow fortress—far from the hustle and bustle of designated parking. This strategic snow disposal ensures our parking lot kingdoms remain unbreached by snow’s tyrannical grasp. But how to craft such bulwarks without offending the land or the sky? Find clarity, my friends, as we engrave commandments into the icy tablets of open-air parking snow strategy.
Survey the Borderlands: Before the snow soldiers march in, map your terrain. Mark regions where snow will not hinder the activities of your automotive subjects, nor block their view.
Safeguard the Drainage Gates: Pile not your snow upon the sacred grounds of sewers and drains. For when the thaw heralds, water must find its exile without pause.
The Perimeter Walk: In the thaw’s aftermath, perambulate your citadel. Ensure that the receding snow hasn’t left behind treacherous ice moats.
Peruse now this tablet of knowledge—a snow pile management chart—for it holds the keys to reclaim not only your parking spoils but also your peace of mind.
Snow Pile Location
Benefits
Considerations
Perimeter of Parking Lot
Maximizes available parking space
Ensure piles do not obstruct visibility for pedestrians and drivers
Plan these areas in advance, factoring in snow removal access and melt runoff
Landscaped Regions and Green Spaces
Avoids snow pile damage to vehicles and infrastructure
Assess the health of the underlying vegetation and soil stability post-thaw
No single commandment stands alone in the lexicon of snow disposal. Your actions must be as fluid and graceful as the snowflakes themselves, ever adapting to the winds of change and challenge. Commit to this strategy, and you’ll weather winter’s siege with poise and preparedness. Let not the snow piles lay claim to your territories; instead, dispatch them with the precision of a chess grandmaster and watch your open-air parking landscape transform into a tableau of triumph.
Pre-Season Prep: Winterizing Your Parking Area
Alas, fellow frost frontiersmen, the time has come for a pre-emptive strike in the annual snow saga—the art of winterizing the parking area. As the leaves bid their final, colorful farewell, our thoughts turn to the impending white blanket that will soon smother our car parks. This is not merely about winterizing parking areas; this, dear comrades, is about fortifying our parking domains against the relentless march of winter.
Behold, the preparations we must undertake to ensure our parking lots remain as steadfast in snow as they are in sun. This is vehicle parking preparation that scoffs at the mere concept of surrender. We are about to embark on a journey of pre-season parking planning so precise that car park maintenance crews will weep with respect at our dedication.
We must first seal the cracks—tiny chasms that threaten to become Grand Canyons under the weight of icy buildup. Consider them the first line of defense in maintaining the integrity of our asphalt kingdoms. Sealants, dear asphalt warriors, are your trusty grouts in the masonry of winter warfare.
Seal the Cracks: Deploy the mighty sealants and banish pavement imperfections.
Establish Snow Policies: Mighty plows and salt spreaders, ready your weapons of snow destruction.
Protective Barriers: Strategically place these silent guardians to shield against the snow’s assault.
Drainage Deftness: Cleanse thine drains, for they are the lifeblood of a snow-free parking shrine.
Our strategies implemented, our defenses arrayed, but we marched on. What is a well-sealed parking surface without the policies that govern the steel blades and salted sands of our snow plows and spreaders? Establish these edicts early and let them be known, for in clarity lies the path to an obstruction-free car park.
Take heed of the protective barriers, oh stewards of the parking spaces! They stand as fortresses against the ravages of plows and sliding vehicles alike. Stalwart concrete blocks, may you ever guard our walkways and landscaping from harm.
And remember, the masterful maintenance of drainage systems so that even the thickest of snow melts flee our parking lands like defeated invaders. Clear these channels posthaste, and watch as your winterizing efforts pay dividends in the form of dry, safe parking terrain.
The unsung heroes of winter, the soldiers in the shadows, and we who undertake car park maintenance are the silent safeguarders of smooth passage. Let our pre-season parking planning be as detailed as our disdain for snow chaos is deep. When the heralds of winter trumpet the arrival of the snowy armada, let them find us ready—our parking areas are a testament to our resolve and an emblem of our vehicle parking preparation.
Timing is Everything: When to Strike at the Snow
As the mercury plunges and the skies darken, the heralds of snowfalls fast approach, and with it, a need for astute snow removal timing. I, your seasonal strategist, am here to unfurl the battle plan for winter car parking readiness. Do not let yourself be caught unawares, for in the art of clearing snow from our vehicular domains, timing is not just a convenience—it is our most potent weapon. So grab your mittens, rebels of the winter wasteland; it’s time we discuss the when, not just the how, of our snowfall response and car park snow strategy.
Pre-emptive Strikes: The Forecasters’ Omen
Monitor weather updates vigilantly; knowledge of an approaching storm is akin to a scout spying the enemy’s advance.
Deploy your snow removal forces at the first sign of flurries—waiting for accumulation is akin to inviting the enemy to dinner.
Intelligent Intervals: The Cadence of Clearing
Conduct clearing operations at regular intervals during ongoing snowfall to prevent insurmountable snow pile buildup.
Remember, small skirmishes are often more swiftly won than epic battles—better to clear three inches of snow five times than to wrestle with fifteen all at once.
Post-Battle Practices: When the Skies Clear
After the snowfall ceases, wage one final, decisive campaign to banish the lingering remnants from your parking domain.
Immediate action post-snowfall prevents ice formation and solidification, the dread enemies of rubber tires and human balance.
Behold, a detailed tableau of optimal removal timing to ensure your car park remains more of a hall of victory than a snow cave of defeat:
Risk of ice and hardpack, increased difficulty in removal
Varied snow and ice conditions
Adjust strategy based on accumulation rate and type
Adaptive response to changing conditions
Decreased efficacy, unpredictable buildup
Master these tenets, my winter warriors, and let the shackles of accumulation bind your parking kingdom. Anticipate, respond with alacrity, and maintain a watchful eye on the heavens—these are the hallmarks of an adept car park custodian. Heed well the importance of snow removal timing, for it is the heart of your parking area’s winter defense strategy. Let the rhythms of nature dictate your actions and your car park will emerge from the storm prepared, resilient, and welcoming.
Maintenance and Upkeep: Preserve Your Parking Space
Winter’s icy tentacles may relent, but the saga of parking space maintenance continues unabated. My dear asphalt comrades, shoveling away the snowy foe is merely the initial skirmish. Behold, the cunning tactics of post-snowfall care that ensure our vehicular havens remain in prime form throughout the frosty season! Let us embark on this perennial journey of residential parking upkeep, a steadfast ritual to keep our lots and driveways as impeccable as a freshly zambonied ice rink.
Foremost, our quest begins with a vigilant eye—continuous surveillance to catch the nefarious ice patches plotting their comeback. Daily patrols will unveil the treacherous, slippery traps that aim to upend man and machine alike. The key is in the reconnaissance; we’re not just clearing the obvious snow piles but waging a silent war against the invisible icy insurgents that threaten the fabric of our maintaining vehicle parking sanctums.
Commence with frequent inspections: A keen eye wards off winter’s stealthy perils post-clearing.
Unleash tactical touch-up removals: Small, swift snow dishonors meet their match.
Enforce a regime of salting: Deploy your ice-melting agents generously as deterrents.
Refuge for the runoff: Ensure meltwater has a clear path for escape to prevent refreezing.
But why rest on our laurels with mere chatter? Behold the maintenance manifest below, a tactical table that lays out the post-engagement measures crucial to our parking domains. Here, you’ll find the distilled wisdom of seasoned parking space upkeep veterans who, through frost and storm, have kept their parking spaces sovereign and unyielding.
Maintenance Action
Purpose
Frequency
Tools of the Trade
Surface Inspection
To identify and mitigate emerging ice and snow threats
Daily
Good lighting, a sturdy pair of boots, and an unwavering gaze
Touch-Up Shoveling
To clear new snowfall and reduce chances of ice formation
As needed, after new snowfall or drifts
A trusty shovel or snow blower, and resilience
Application of Ice Melt
To prevent ice bonding to the pavement surface
Following snow clearing, before expected freeze
Calcium chloride or sodium chloride, calibrated spreaders
Drainage Check and Clearing
To prevent water pooling and refreezing
Before and after each snowfall
Drain spades, snakes, or a professional plumber on speed dial
So there you have it, fellow guardians of the tarmac—your blueprint for perpetual dominance over winter’s bluster. Enact these strategies of parking space maintenance with the poise of a snow leopard and the tenacity of a plow. Let us wield our shovels as scepters, ruling over our gleaming asphalt courts with wisdom and might. For what is a rebel if not the master of their own frosty fate? Onward, to an orderly, slip-free season!
Conclusion: Shovel Up and Revel in DIY Snow Clearing Victory
Standing tall
The journey through the wintry world of DIY snow sweepinghas been arduous but triumphant. I’ve armed you with knowledge and strategies, converting snow-laden parking areas from icy battlefields into beacons of victory. This is no mere tale of triumph; it’s an ode to the empowerment of every parking area custodian. Enacting these parking area solutions ingrains in us the sheer satisfaction of maintaining vehicle parking spaces in pristine condition through the frostiest of times.
As the chapters of winter continue to unfold, consider this article your DIY snow clearing manifesto. It’s a reminder that conquering the cold is not just about relentless shoveling—it’s about smart preparation, strategic timing, and regular upkeep. Through the snowfall skirmishes, we’ve cast aside the shovel’s dread, choosing instead to court victory with each stroke, creating asphalt artworks devoid of the season’s white chaos.
Jezzie shoveling snow
So stand tall, my fellow asphalt warriors, for we’ve delved into the depths of snow removal’s secrets, and emerged more formidable. Let us continue to craft our parking area solutions with wit and determination. The profound sense of pride in an immaculate parking domain is yours to savor, and the tale of your DIY snow removal victory—a yarn spun for many winters to come.
Bonus Blizzard Busters
Cover Your Driveway Before It Snows
Throw thick plastic tarps over your driveway before the snowfall. Once the snow stops, just drag the tarp off. It’s like unveiling a surprise, but the surprise is just your clean driveway.
Snow melt mats are heating pads made for both driveways and smaller spaces such as decks or sidewalks. They are laid down ahead of the big, blustery storm and work their magic. This is a great trick when someone has never seen one in action. I told my kids it was the “Elf on the Shelf” Jezzie, but after Christmas, she’s invisible. It kept them busy trying to catch her in action every time it snowed the first season I had it. Suckers
Use Your Leaf Blower to Remove Snow
Who said leaf blowers are just for leaves? Blast that light, fluffy snow off your driveway like you’re conducting a symphony. Just try not to aim it at your neighbor’s driveway, tempting as it may be.
Ah, winter! The magical time when all you want to do is cozy up in your fluffy socks with a cup of hot cocoa and read about attic insulation. I mean, who doesn’t want to finish their day staring into a world of fiberglass and foam? If you’re like me and nothing gets you more excited than winterizing your home, you’re in for a real treat. Trust me, getting your attic all prepped and snuggled in for winter is as exciting as a weekend in Vegas when you take on the task to replace attic insulation.
But the question is, “How do I add more insulation to my attic without breaking the bank?” Because, let’s be honest, saving money on home improvement is like winning a poker tournament. It rarely happens. Lucky for you, I’ve got the inside scoop on everything from DIY insulation hacks to spray foam costs per square foot. You’ll be toasting to your toastier home in no time.
Key Takeaways
Learn the ins and outs of DIY attic insulation.
Get smart about insulation costs and replacement strategies
Master the art of winterizing like a pro without breaking the bank in the process
Replace Attic Insulation: Get Cozy & Comfy with DIY
Ah, winter. That time of year where everything screams, “Please warm me up, for the love of all things toasty!” Our homes are no exception, and nothing sends me into fond memories of dear Mr. Ex’s bizarre heating habits—the man sweats more like a marathon runner in a sauna than thinking about insulating my attic. So, let’s dive into the fluffy, itchy world of DIY attic insulation. I promise, it’s less messy and uncomfortable than my divorce.
Choosing Your Fluff: Insulation Types
There are so many types of attic insulation, it’s like trying to decide which ex’s sweatshirt to steal for that extra warmth. Here are your main contenders:
Fiberglass Batts – the classic pink, fluffy stuff. It’s like wearing grandma’s quilt, but up in your attic. Fairly inexpensive, easy to install, and resistant to moisture.
Cellulose – made of recycled materials, is your eco-friendly cousin of insulation. Tiny particles ensure it gets into all those nooks and crannies, just like your memory of Mr. Ex’s annoying habits.
Each has their own quirks, just like my many exes, and the cost varies just like the dates they took me on—from cheap to extravagant. Do your research and find the right fluff to keep you warm.
Measuring Up: Replacing Attic Insulation
Alright, DIYers, it’s time to measure up for some attic insulation—and no, I’m not talking about Mr. Ex’s emotional unavailability. We’re diving into the world of R-value. This isn’t R for ‘Revenge’ on your ex, but it might as well be. R-value is all about how well your insulation plays defense against heat or cold. Think of it as your attic’s shield against the elements, and much like my shield against Mr. Ex’s lame excuses, the higher the R-value, the stronger the defense.
So, here’s a breakdown of what R-value you should aim for based on where you live. I’ve added a touch of humor to keep it spicy – because who said insulation had to be boring?
<
Zone
Climate
Ideal Total R-Value Range
Zone 1
Hot, humid, “I need a cold drink, stat!”
R30-R49
Zone 2
Pretty warm, “Is it summer all year?”
R30-R60
Zone 3
“Did I just step into a sauna?”
R30-R60
Zone 4
“Maybe I should start knitting a sweater.”
R38-R60
Zone 5
Getting chilly, “Where did I put those mittens?”
R49-R60
Zone 6
Freezing, “Do icicles come with the house?”
R49-R60
Zone 7
Sub-zero, “Is this the Arctic or my backyard?”
R49-R60
Now, to figure out how much insulation you need (let’s call it ‘Exes’ worth, for fun), measure your attic’s square footage. Then, cross-reference it with your desired R-value from our sassy table. No need to get into the nitty-gritty math here; let’s leave the complex calculations to the accountants (and we know how Mr. Ex struggled with those).
And voilà! You’re ready to replace that attic insulation like the DIY warrior you are. It’s like giving your home a warm hug, something Mr. Ex could never quite grasp. Let’s just hope he doesn’t get any ideas about moving into your newly insulated, cozy attic space!
Feeling the Pinch: Insulation Costs
Ah, the joys of homeownership! The never-ending game of “how many ways can I spend money on this place?” is at an all-time high this winter. Mr. Ex left me with a freezing attic, and those heating bills aren’t getting any lighter. It’s time to dive into the world of insulation and face the costs head-on.
Foam Party: Spray Foam Costs
I thought my days of foam parties ended in college, but little did I know that I’d be having one in my attic! Spray foam insulation is all the rage these days. It turns out that it’s not only a great way to insulate, but it also poses a barrier to air and moisture. Plus, it’s got that expanding goodness that fills in all the nooks and crannies. Here’s a look at the cost breakdown for this fabulous foam fiesta:
Low-end, open-cell foam: $0.44–$0.65 per square foot. It’s an economical option, like buying cheap vodka at the store. You’ll get the job done, but it might not be the smoothest experience.
High-end, closed-cell foam: $1.00–$2.00 per square foot. This is the top-shelf choice, offering better insulation and even doubling up as a vita wall reinforcement.
hic It looks like my old college habits of picking up cheap booze are paying off in the world of insulation.
Rolling in Fiberglass: Average Costs
Let me tell you, darling, if I had a dollar for every time I’ve fantasized about rolling around in piles of money and fiberglass insulation… Well, I’d have enough to actually roll around in fiberglass insulation. Kidding! A girl can dream, though, right? In the meantime, let’s break down how much it’s going to cost to get cozy with fiberglass batts.
Average cost of fiberglass batts: $1.20–$1.60 per square foot, including installation.
Average cost to insulate a 1,000-square-foot attic: $1,200 – $1,600
Considering the total life savings I’ve wasted on Mr. Ex and his everlasting divorce saga, I would say it’s not too shabby. Plus, it turns out fiberglass batts are much friendlier on the environment than foam. So, I might as well save some polar bears and help the environment while insulating my attic. Oh, the fun never stops in homeownership!
As I feel the chill in the air grow sharper, the threat of a “snowpocalypse” looms—not just a mythical buzzword, but a frigid reality for many. This year, I’m determined that winter houses will stand as a bastion against the cold, a testimony to single mom DIY hacks and winterizing secrets that champion winter weather preparedness. Wrapping my home in a cocoon of insulation, ensuring every door and window is sealed with weather stripping, and stocking up on emergency kits is just the start. With power outages, the risk of frostbite, and hypothermia accounting for winter’s stealthy dangers, arming oneself becomes less of a choice and more of an imperative. Here’s how you, too, can transform your cozy abode into a snug fortress.
Key Takeaways
The big freeze
Understanding winter weather alerts is crucial for early preparation.
Insulate your living space and utilize weather stripping to block drafts.
Emergency kits should cater to specific needs, such as medications and pet supplies.
Familiarize yourself with the signs and preventive steps for frostbite and hypothermia.
Ensure alternative heat sources are used safely to avoid carbon monoxide poisoning.
Create a car emergency kit to stay equipped for winter travel uncertainties.
Prepping Winter Houses for the Big Freeze
As I watch the mercury dip lower on the thermometer, I’m reminded that now is the time to start prepping and winterizing my home. Trust me, feeling snug as a bug when it’s snowmageddon outside is all about having a plan. That means making a winterization checklist, stocking up on caulking, and getting friendly with some weather stripping. It’s a DIY mission that’s equal parts labor and love, making sure my sanctuary can shrug off the big freeze with ease. Let’s dive into some of the nooks and crannies that’ll keep your home toasty.
Forget to winterize?
“An ounce of prevention is worth a pound of cure.”
Last winter, I learned that lesson the hard way when a pesky air leak frosted over my kitchen faster than a snow cone in July. After consulting every source I could, I realized that sealing those air leaks isn’t just about staying warm; it’s also about energy conservation. So here are a few pointers that kept me—and can keep you—out of the cold:
Insulation Checks: I like to think of home insulation as my fortress wall against the cold. Attics are infamous for letting warmth escape, so I beefed mine up with some extra insulation. If your insulation levels are looking a little thin, now’s the time to add more.
Piping Patrol: Trust me, nothing’s less fun than a burst pipe when it’s a winter wonderland outside. Now, you can cover your pipes with foam sleeves or use heating tape to prevent them from becoming popsicles.
Window Warding: Last year, I felt a draft by the window and noticed my curtains fluttering like a ghost was about it. If you’ve experienced the same, maybe it’s time to look into double-pane or storm windows to keep Jack Frost from nipping at your nose.
This year, I’m arming myself with caulking and weather stripping like I’m prepping for a battle with the elements. These handy tools are like the sealant knights defending the castle, plugging up any spots where the cold air might sneak in. You’ll find me using them to shore up door frames, windowsills, and any other gaps that might be letting the warmth slip away.
Here’s a peak at my winterization checklist designed to maximize home efficiency:
Action Item
Tools Required
Check Completed
Attic Insulation Top-Up
Respirator, Gloves, Insulation Material
✓
Pipe Wrapping
Foam Sleeves or Heating Tape
✓
Weather Stripping Application
Weather Strips, Utility Knife, and Tape Measure
✓
Sealing Cracks and Leaks
Caulk, Caulking Gun
✓
Checking Doors and Windows
Screwdriver Set, Replacement Weather Stripping
✓
While ticking items off this list, I’m not just ensuring my home is a cozy cave for hibernation; I’m optimizing the warmth generated by every dollar spent on heating. That’s right; it’s all about stretching those heating bills and saying no to the dreaded draft.
A well-prepared home isn’t just a shelter; it’s a warm embrace on the coldest of days. And these winterizing hacks aren’t just about comfort; they symbolize taking charge, being responsible, and knowing that when winter throws its worst at you, you’re more than ready for the challenge. So, grab that caulk and the weather stripping, my friends. It’s time to turn our houses into winter-proof fortresses!
Safeguarding Against the Silent Killer: Carbon Monoxide Awareness
Winter’s frosty embrace brings a seasonal spike in the use of various heating appliances, which, while cozy, escalate the risk of carbon monoxide (CO) poisoning hazards. I can’t stress enough the importance of being proactive. It’s about weaving carbon monoxide awareness into the fabric of our daily routines and ensuring that our homes are safe spaces for ourselves and our loved ones. As the temperatures plummet, our reliance on heating systems skyrockets, prompting me to remind you all about the hazards of the ‘silent killer’.
“An invisible threat lurks in the warmth of our hearts and homes.” This is something I often ponder as I conduct my regular safety checks, primarily around heating systems. It’s why my home is equipped with carbon monoxide detectors on every level, especially near bedrooms, to ensure that any whisper of this odorless, colorless gas doesn’t go unnoticed.
Please take note: a mere installation isn’t enough. Consistent checks to ensure that your detectors function correctly could mean the difference between a safe haven and a tragic accident. Here’s how to make generator safety and general CO poisoning prevention part of your family’s lexicon:
Testing and Battery Changes: Regularly test your CO detectors and change batteries at least twice a year—I find aligning this with daylight savings times works as a useful reminder.
Proper Placement: Install your detectors at least 15 feet away from fuel-burning appliances to prevent false alarms and place them on every level of your home for comprehensive coverage.
Know Your HVAC Systems: Like any other machine, ensuring your HVAC systems are properly maintained and functioning optimally is key. I schedule a professional check-up annually.
External Appliance Use: Never forget, generators and outdoor heating units pose significant risks when improperly used. They should be positioned at a safe distance—20 feet or more—from windows, doors, and vents to avoid CO seepage indoors.
Even with these precautions, it’s essential to educate ourselves and our families on recognizing the symptoms of CO exposure, such as headaches, dizziness, nausea, or chest pain, and to act immediately if detectors alarm.
CO Safety Check
Frequency
Responsible Action
Test CO Detectors
Monthly
Press the test button to ensure functionality
Battery Replacement
Semi-Annually
Replace with new batteries and test again
HVAC System Inspection
Yearly
Professional servicing and cleaning
Generator Operation Training
Seasonal Preparation
Review safe operating procedures with all household members
In the still, silent winter months, it’s pivotal not to let our guard down against the insidious threat that CO poses. Through diligent monitoring and preemptive measures, we can successfully shield our homes from CO poisoning. It begins with awareness and culminates in action, embracing everything from the humble battery change to thorough generator safety education. It’s not merely a seasonal chore but a year-round commitment to the safety and wellbeing of our families.
Wrap yourself in the security blanket of knowledge and proactive prevention, and winter can remain a picturesque and treasured time of year—unmarred by the perils of the silent killer. Take heart and take charge, and let’s commit ourselves to a vigilant, cozy, and safe winter season.
The Heart of Warmth: Furnace Maintenance and Efficiency
As I settle into the cozy corners of my home during the frosty months, there’s a comforting hum that assures me warmth won’t wane—the sound of my trusty furnace working overtime. This magical machine, the king of furnace efficiency, demands regular check-ups to prevent a chilly dethronement. Trust me; nothing nips the nose quite like waking up to a broken furnace amidst an icy blizzard. So, let’s talk about keeping the heart of your home beating strong with steadfast furnace maintenance.
My yearly ritual includes replacing furnace filters regularly—every month or two, in fact, depending on use. It’s a simple switch that evades costly consequences and ensures clean, allergen-free air circulates through my living spaces. Then, as the leaves start to turn, I reach out to a certified HVAC technician for a thorough HVAC tune-up. It’s like a health check for your furnace, essential for extending that much-needed furnace’s longevity.
“An ounce of prevention…””—you know the rest. It rings especially true when it involves complex HVAC systems that embrace your home with warmth. Be vigilant. Watch for uneven heating, strange noises, or a spike in your heating bill—telltale signs that your furnace might be falling short of its vaunted efficiency.
Regularly replace furnace filters to improve air quality and efficiency
Schedule a yearly HVAC tune-up to prevent unexpected breakdowns
Stay aware of signs that indicate your furnace may be underperforming
Starting the season with a clean filter is a must!
October
HVAC System Tune-Up
Ensures system is prepared for the heavy lifting in winter months
December
Mid-Season Filter Check
If necessary, replace to maintain optimal air flow
February
Check-up on vents and registers
Ensure clear pathways for heat distribution
April
End-of-Season Evaluation
Identify any repairs in preparation for next winter
By sticking to this regimen, not only has the comfort within my walls gone uncompromised, but the bills, the bane of winter expenses, have shown mercy. The correlation between proactive furnace maintenance and a trimmer utility bill cannot be understated—it’s real and it’s fabulous. This is not just about saving money; it’s about preserving that sense of sanctuary against winter’s bite.
And there you have it, folks. Tending to your home’s heating is akin to stoking the fire of a hearth; it requires time, care, and attentiveness. As we count down the days to winter’s arrival with pomp and festive cheer, keep in mind—a well-maintained furnace and efficient HVAC system are your best allies against the frost. So, befriend your HVAC technician and ride out the snowy season in balmy bliss.
Plumbing Hacks to Prevent the Big Freeze
Winter never fails to remind us of its icy might, and nothing gives a colder reception than frozen pipes scampering beneath our homes. My personal battle against the season’s frosty army includes a strategic game plan for freeze protection that relies on savvy plumbing maneuvers. Let me unwrap some key tactics to keep your winterizing plumbing system in top shape so you can outsmart the frigid foes before they strike.
“To wrap or not to wrap, that should not be a question.” When considering how best to ensure insulating pipes remain unfrozen, I echo this modern adaptation of the Bard’s famous line. Let me share the techniques I implement with the determination of a seasoned warrior steeled for wintertime warfare.
Insulation: I begin by encasing exposed pipes like a cocoon, using foam pipe sleeves that slip on with ease, providing a steadfast barrier between my pipes and the invasive cold.
Heat Tape: For areas where the chill bites harder, I employ the steady vigilance of heat tape, electrically embracing pipes to keep them just warm enough to defy freezing.
Antifreeze: In some cases, like for the rarely utilized guest bathroom, a sip of antifreeze in drain traps and toilets can be just the potion to prevent a frosty plumbing mishap.
Shut-Off Valves: Knowing where the main water valves play hide-and-seek in my home has been a game-changer. When the mercury plummets, a quick shutoff can avert an impending disaster.
And let’s be honest, discovering a burst pipe is the winter nightmare we all fear. Below lies my meticulously crafted checklist and table to ensure every plumbing corner is prepared for winter’s chill.
Pipe Location
Insulation Method
Special Considerations
Attic and Basement Pipes
Foam Sleeves
Check for air leaks and seal them to enhance protection.
Outdoor Faucets
Insulated Covers
Drain and shut off outdoor lines before the first freeze.
Under-Sink Pipes
Cabinet Door Insulation
Keep cabinet doors open occasionally to allow warm air circulation.
Garage Pipes
Heat Tape and Insulation
Maintain above-freezing temperature or use antifreeze in traps.
Let me assure you, these plumbing hacks are not about overkill; they are your best containment strategy against winter’s wrath. And remember, when it comes to wrap the pipes, better to be snug in layers than sorry with leaks. As winter tightens its grip, cozy up, and let your well-insulated plumbing system weather the storm with robust resilience.
Roof and Gutter Winterization Tactics
As winter approaches, I always turn my attention to the upper echelons of my home—my roof and gutters. They are the front liners in the battle against snow and ice, and their soundness is crucial to my home’s overall efficiency during the chilly season. Optimizing these areas for winter can seem daunting, but it’s absolutely necessary to avert potential damage. So let me walk you through my methods of ensuring a winter-ready roof and stable gutters, drawing from years of homeowner grit and resilience.
First up is shingle scrutiny. I scramble up the ladder to thoroughly inspect each shingle for damage. Cracked, loose, or missing shingles are like open invitations for water and ice damage, so they get promptly replaced. It’s like knitting up holes in a warrior’s armor—you don’t want to go into battle unprotected.
Next, I strategize ice management. Clearing the gutters is paramount. They’re the unsung heroes channeling the runoff away from my foundation. Any clogs from autumn’s leaves can spell disaster, so I make certain they’re debris-free and secured. Clogged gutters during winter lead to ice damming, which is one adversary I prefer not to face!
Here is where snow guards play their starring role. Like sentinels on the rooftop, they prevent the perilous snow slide that can occur on sloped roofs. I’ve made sure to install sturdy snow guards that suit the aesthetics of my house while performing their crucial role in snow management.
Here’s my personal process for winterizing my roof and gutters, listed in order of execution:
Inspect Shingles: Check for any signs of wear or damage and replace as needed.
Clean Gutters: Remove leaves and debris to ensure unobstructed water flow.
Secure Gutters and Downspouts: Tighten any loose elements to ensure they are firmly attached.
Add Insulation: Increase attic insulation to prevent heat from melting snow on the roof unevenly.
Snow Removal: Just get right to it; I prefer to, as it falls about every 3–5″ or so. Unless an angry snowplow or blizzardly winds come to pee in my frosted flakes, it’s much easier and less overwhelming to do it in small tranches rather than one big haul. I motivate myself by calculating the calories burned by doing intervals, then compensating those calories with more peanut butter whiskey. Or, just tell the kids to do it. Isn’t that why we had kids in the first place?
And now, for a look at the critical checklist I adhere to each year:
And there you have it—a fortified roof and steadfast gutters ready to take on the wrath of winter. This process not only wards off the worry of water damage but also boosts my home’s efficiency, holding heating costs at bay and ensuring peace of mind as I watch the snowflakes drift peacefully down from the comfort of my warm abode. Remember, a little effort in winterization goes a long way in avoiding the harrows of spring repairs.
Creating Your DIY Weatherproofing Brigade: Tools and Supplies
When the winds of winter start to whistle through the cracks, it’s my cue to mobilize the DIY weatherproofing brigade. This personal task force isn’t just about making my living space snug; it’s about taking an active stance in the battle against the bite of the cold. Assembling the right tools and supplies can be a game-changer for energy efficiency and comfort. Now, let’s talk strategy for weatherproofing doors, sealing windows, and insulating spaces that love to leak precious warmth.
Last year, I learned the hard way that weatherstripping and caulking are not just optional touches—they’re essentials. I found myself enlisting various draft stoppers, sealants, and rolls of insulation like a general gearing up for a showdown—and it paid off.
“An energy-efficient home starts with meticulous sealing and insulation.”
Here’s a rundown of my go-to toolkit for weatherproofing essentials:
Weatherstripping materials for doors and windows
Attic winterization
Expanding foam sealant for those sneaky gaps
Caulking gun loaded for precision sealing action
Insulation rolls to bulk up the attic’s defenses
Vapor barrier sheets to prevent moisture from undermining my efforts
But a toolkit is only as good as the hands that wield it—so get comfortable with these tools and techniques. Having the skills to weatherproof doors and windows is one among many capes you’ll don in your mission to outsmart frost’s thievery.
Remember, quality insulation is about more than staying warm; it’s about efficiency that resonates with your wallet.
Tool/Supply
Use Case
My Tip
Door Sweep
Sealing the bottom of doors
Measure twice, install once for a draft-free seal.
Weatherstripping Adhesive
Securing stripping in place
Apply in a well-ventilated area and let cure fully.
Window Insulation Film
Adding an extra layer against window drafts
Smooth out all air bubbles for better insulation.
Attic Stair Cover
Insulating the attic entrance
It’s a simple solution with significant impact—don’t overlook it.
Fiberglass Insulation Batt
Layering up within walls and attic floors
Don the gloves and mask, fiberglass can be itchy business.
And don’t forget, the art of insulation extends to your attic—a place where heat loves to escape. Whether you’re going the route of fiberglass or fancier materials like rockwool, insulating the attic can single-handedly elevate your home’s warmth retention.
Whether it’s your first rodeo or you’re a seasoned vet of the DIY weatherproofing brigade, having a robust repository of tools and supplies is your first step toward victory over the voracious vortices of chill. So gear up, get educated, and start fortifying your winter house against the seasons’ siege.
The Ultimate Home Energy Savings Guide
Embarking on the quest for maximum home energy savings, I’ve come to realize the profound impact of energy conservation in my own living space. The key lies in effectively utilizing insulation, crafting an energy-efficient home, and embracing technologies that complement an economical lifestyle.
To cultivate a comfortable yet energy-efficient home, I’ve learned the importance of selecting the appropriate insulation materials. The choice between batting, foam, fiberglass, wool, and rockwool is not one to take lightly, as each has distinct thermal retention properties, which are critical for winter houses energy efficiency.
Fiberglass Insulation: Popular due to its convenience and cost-effectiveness, fiberglass insulation helps reduce energy loss through walls and attics.
Foam Insulation: Available in spray or rigid forms, foam provides an airtight seal, significantly reducing energy waste.
Rockwool Insulation: Known for its fire resistance and soundproofing capabilities, rockwool also has higher R-values for better thermal efficiency.
Wool Insulation: A sustainable and natural option, wool insulation is an excellent energy saver due to its breathability and moisture-wicking features.
While insulation is a cornerstone of energy conservation, it’s only part of the overall equation. My weatherproofing journey also involves enhancing door and window installations and committing to routine maintenance checks to seal off any energy-siphoning air leaks. Here’s how I ensure everything remains sealed tight:
Upgrade
Benefits
Personal Tips
Energy-Efficient Windows
Improved insulation and solar heat gain reduction
Opt for double or triple-pane windows with low-E coatings
Door Weather Stripping
Prevents drafts and energy loss around door frames
Check annually and replace if you see visible wear or drafts
Sealed Air Leaks
Keeps out unwarranted cold or heat infiltrations
Use thermal detectors to identify problematic areas
Lastly, to bring it all together, I’ve harnessed the power of technology by installing a programmable thermostat. This little device has been nothing short of revolutionary, allowing me to tailor my heating and cooling patterns for optimal energy conservation.
An efficient home is the sum of its parts. Every degree adjusted on the thermostat, every inch of insulation counts in the fight for energy conservation and an eco-friendly abode.
I believe in being a steward of my environment, and weaving energy conservation practices into the fabric of my daily life has made my winter house energy efficient and cost-effective. By sharing this knowledge and experience, I hope to inspire others on their journey to an energy-conscious lifestyle.
Surviving a Power Outage: Alternative Heating and Light Sources
As the grip of winter tightens, a power outage is not just an inconvenience but a true test of cold weather survival. It’s times like these that having a plan for alternative heating and light sources becomes vital. In my own home, I’ve taken strides to ensure that we’re never left in the cold and dark, nurturing a lifestyle that flirts with aspects of off-grid living.
“Be prepared, not scared.” That’s my winter motto. In the heart of a power outage, my trusty wood-burning stove stands at the ready. It’s more than a quaint feature—it’s a robust provider of warmth, the kind that wraps you up and reassures you that you’ll weather the storm.
But not all of us have a wood stove or fireplace, and that’s okay. There are plenty of options, like portable propane heaters, which I’ve found to be a godsend. They’re relatively affordable and easy to move around, making them perfect for directing heat exactly where it’s needed, however, they can be extremely dangerous without proper ventilation and should be reserved mainly for indoor and outdoor spaces. Let’s not forget about electric heaters with battery backups—a modern solution for keeping warm that can be a real game-changer.
Always ensure ventilation when using combustion heaters, like wood-burning stoves or propane units.
Keep flammable materials at least three feet away from heating sources.
Never leave alternative heating sources unattended—safety first!
Heating Method
Type
Notes
Wood-burning stove/Fireplace
Combustion
Needs a well-maintained chimney or vent and offers a cozy ambience
Propane Heater
Portable
Uses clean-burning fuel; requires good room ventilation
Electric Heater with Battery Backup
Electric
Eco-friendly; unaffected by ventilation issues
When it comes to light sources, it’s essential to have a collection ready. My favorites are LED lanterns that provide a wide arc of light, are energy-efficient, and are robust against the long hours of the night. Flashlights are a given and solar-charged lights embody that sustainable angle I appreciate—being kind to the environment even during emergencies.
Remember, proper alternative lighting not only offers visibility but also safety and comfort in times of a blackout.
As I adopt and adapt to these alternative heating and lighting methods, I can’t help but share these insights that have been instrumental in navigating through a power outage. From the warmth of a furnace to the serene glow of a lantern, each has its role in an effective cold-weather survival strategy.
Conclusion: Winterize Your Sanctuary Against the Frosts of Father Winter
As I reflect on the shielded sanctum that is now my winter house, I appreciate the importance of these winterizing tips for snowbirds and dwellers alike. My guide to winterizing your winter house has been an earnest chronicle, narrated to empower you with knowledge for securing, protecting, and fortifying your home against the harsh elements. Armed with a comprehensive winterization checklist, we’ve ventured together through the various preparations—from insulation to emergency lighting—that serve as a cogent strategy for battling the elements.
Assimilating this information has transformed the seasonal battle into a tactical puzzle; each move from sealing windows to preparing an emergency kit contributes to a bigger picture of a robust, warm, and energy-efficient habitat. These protective measures, while technical and tasking, echo the sentiment of preserving not just the physical form of our winter houses but the emotional comfort that thrives within the walls we call home.
Witnessing the transformation of my abode into an impervious haven, I’m confident that we’re ready for whatever blizzards and frosts may come our way. May this guide serve you well, whether you’re nesting down or sojourning southwards, in ensuring your home is a bastion of warmth and safety through the wintry season. Now, as the cold winds howl their icy laments outside, my heart is content, knowing that the chill shall not pass my doorstep.
FAQ
How can I prepare my winter house for winter weather emergencies?
Start by maximizing the insulation of your home and making sure all weather stripping is intact. Prepare emergency kits that include essentials like medication, supplies for your pets, flashlights, and a battery-powered radio. Verify that smoke alarms and carbon monoxide detectors are working correctly and familiarize yourself with winter weather terms to understand potential advisories and warnings.
What should my winterization checklist for the big freeze include?
Your checklist should include sealing air leaks with caulking, adding appropriate insulation, checking for drafts around windows and doors, wrapping pipes to prevent them from freezing, and optimizing your home’s efficiency to conserve energy. Lastly, ensure you have a systematic approach to assessing each part of your home.
How do I protect my family from carbon monoxide poisoning?
Install carbon monoxide detectors with battery backups in key areas of your home and perform regular safety checks. Be prudent when using alternative heat sources like generators—ensure they are placed outdoors, away from windows, to avoid indoor carbon monoxide buildup. If you suspect CO poisoning, get fresh air immediately and seek medical attention.
What routine maintenance should I do on my furnace to stay cozy during the winter?
Replace your furnace filters regularly and schedule an annual HVAC tune-up with a certified technician. Keep an eye out for signs that your HVAC system may not perform optimally. Regular maintenance not only improves efficiency but also extends the longevity of your furnace.
How can I avoid frozen pipes in my winter house?
Prevent pipes from freezing by insulating them, especially in areas that are not heated. You can use foam pipe sleeves or heat tape for added protection. Learn where your main water valve is in case of an emergency and how to properly use antifreeze in your plumbing system. Extra insulation in vulnerable areas can save you from potential burst pipes.
What are the best practices for winterizing my roof and gutters?
Ensure your roof’s shingles are inspected and in good condition; replace them if necessary. Install snow guards to manage snow loads and prevent ice dams. Clean gutters so that meltwater can flow freely, which also helps prevent ice buildup and potential water damage.
What tools and supplies do I need for effective weatherproofing?
Gather tools and supplies such as draft stoppers, sealants, insulation kits, caulk, and weatherstripping materials for your doors and windows. For your attic, you might need different insulation layers, so stock up those as well. Ensure you have all the right tools to apply these materials effectively.
How can I increase my winter home’s energy efficiency?
Besides weatherproofing and insulation, consider energy-efficient doors and windows, check for air leaks, and use programmable thermostats to manage heating. Choose insulation materials that are suitable for your home, like batting, foam, fiberglass, wool, or rockwool.
What should I do for heat and light during a power outage?
Prepare alternative heating sources, such as wood-burning stoves, fireplaces, or portable heaters that run on electricity, propane, or kerosene. Ensure proper ventilation to prevent carbon monoxide poisoning. For lighting, stock up on LED lanterns, flashlights, and, if available, solar-charged lighting options.
What are some winterizing tips for snowbirds or those with a winter house?
If you’re leaving your winter house for an extended period, ensure you’ve properly insulated and weatherproofed the house, drained the plumbing system, set the thermostat at an appropriate temperature to prevent freezing, and perform a thorough safety check before you leave. Secure the property and consider having a neighbor or property management service check on the house periodically.
Manage your privacy
To provide the best experiences, we use technologies like cookies to store and/or access device information. Consenting to these technologies will allow us to process data such as browsing behavior or unique IDs on this site. Not consenting or withdrawing consent, may adversely affect certain features and functions.
Functional
Always active
The technical storage or access is strictly necessary for the legitimate purpose of enabling the use of a specific service explicitly requested by the subscriber or user, or for the sole purpose of carrying out the transmission of a communication over an electronic communications network.
Preferences
The technical storage or access is necessary for the legitimate purpose of storing preferences that are not requested by the subscriber or user.
Statistics
The technical storage or access that is used exclusively for statistical purposes.The technical storage or access that is used exclusively for anonymous statistical purposes. Without a subpoena, voluntary compliance on the part of your Internet Service Provider, or additional records from a third party, information stored or retrieved for this purpose alone cannot usually be used to identify you.
Marketing
The technical storage or access is required to create user profiles to send advertising, or to track the user on a website or across several websites for similar marketing purposes.


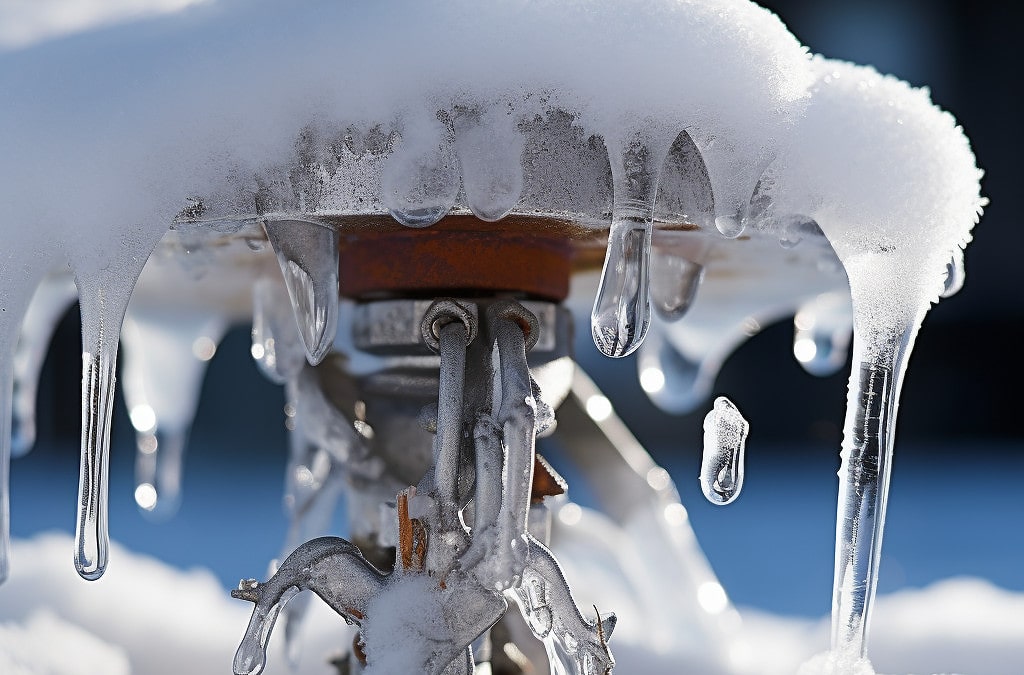


 power—and power leads to clear pavement.